Easter cookies are a delightful treat that bring a splash of fun to your holiday celebrations. With vibrant colors and whimsical shapes, they add a sweet touch to your spring festivities. Whether you’re baking with family or enjoying them as a seasonal indulgence, these cookies are sure to brighten your day and bring some joy to the festivities!
Coconut Macaroon Nests
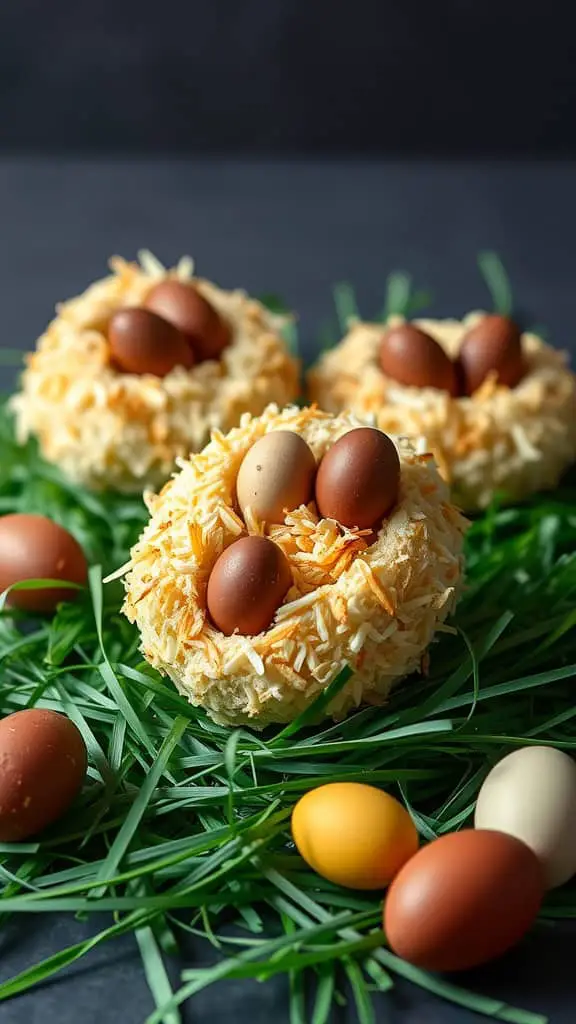
Coconut macaroon nests bring a delightful twist to traditional Easter cookies. These sweet treats are chewy on the inside and crispy on the outside, creating a perfect contrast that will make your taste buds dance. With a lovely coconut flavor, they’re not just tasty but also a fun and festive addition to your holiday spread.
Making these nests is straightforward and enjoyable, making them a great choice for baking with kids or friends. Plus, they can be topped with chocolate eggs for that extra touch of Easter charm. Let’s get started with this simple recipe!
Ingredients
- 2 1/2 cups sweetened shredded coconut
- 1/2 cup granulated sugar
- 1/4 cup all-purpose flour
- 1/4 teaspoon salt
- 4 large egg whites
- 1 teaspoon vanilla extract
- Chocolate eggs (for decoration)
Instructions
- Preheat the oven to 325°F (160°C) and line a baking sheet with parchment paper.
- In a large bowl, combine the shredded coconut, sugar, flour, and salt.
- In a separate bowl, beat the egg whites until soft peaks form. Gently fold the egg whites and vanilla extract into the coconut mixture until well combined.
- Using your hands or a spoon, form small nests by shaping the mixture into rounds with an indentation in the center. Place them on the prepared baking sheet.
- Bake for 20-25 minutes, or until the edges are golden brown. Allow to cool completely.
- Once cooled, fill the nests with chocolate eggs for a festive finish!
Chocolate Egg-Centric Treats
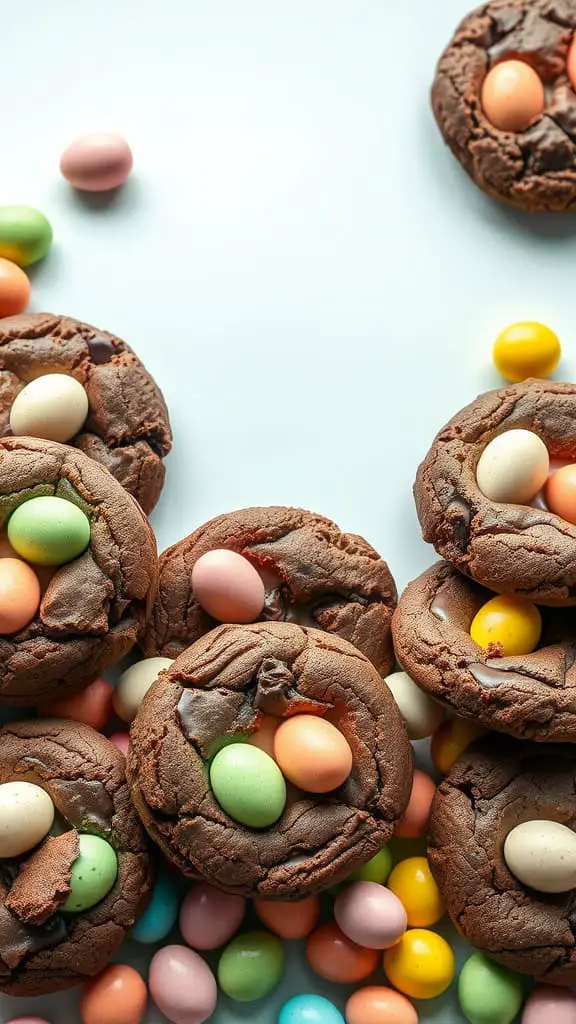
These chocolate egg-centric treats are a delightful way to celebrate Easter. They combine rich, chocolatey flavors with the fun of colorful candy eggs, making them both tasty and visually appealing. Perfect for baking with kids or sharing with friends, these cookies offer a simple yet satisfying sweet treat that captures the spirit of the holiday.
The cookies have a chewy texture with melted chocolate chips and a sweet surprise in the center. Not only are they easy to make, but they’re also a fantastic addition to any Easter gathering, sure to brighten up your dessert table!
Ingredients
- 1 cup unsalted butter, softened
- 1 cup brown sugar
- 1/2 cup granulated sugar
- 2 large eggs
- 1 teaspoon vanilla extract
- 2 cups all-purpose flour
- 1/2 cup cocoa powder
- 1 teaspoon baking soda
- 1/2 teaspoon salt
- 1 cup chocolate chips
- 1 cup assorted candy eggs (like chocolate or pastel eggs)
Instructions
- Preheat the Oven: Preheat your oven to 350°F (175°C) and line a baking sheet with parchment paper.
- Mix the Wet Ingredients: In a large bowl, cream together the softened butter, brown sugar, and granulated sugar until fluffy. Add the eggs one at a time, mixing well after each addition, and then stir in the vanilla extract.
- Combine the Dry Ingredients: In another bowl, whisk together the flour, cocoa powder, baking soda, and salt. Gradually add this dry mixture to the wet ingredients, mixing until combined. Fold in the chocolate chips.
- Shape the Cookies: Scoop out tablespoon-sized portions of dough and place them on the prepared baking sheet, spacing them about 2 inches apart. Press a few candy eggs gently into the center of each cookie ball.
- Bake: Bake in the preheated oven for 10-12 minutes, or until the edges are set but the centers are still soft. Let them cool on the baking sheet for a few minutes before transferring to a wire rack to cool completely.
Pastel Frosted Flower Cookies

Pastel frosted flower cookies are a delightful treat that perfectly capture the essence of spring. These cookies combine a soft, buttery base with a smooth, sweet frosting, making them a joy to eat and even more fun to decorate. They’re not only tasty but also simple to make, making them a great choice for both baking novices and experienced cooks.
The vibrant pastel colors and flower shapes make these cookies ideal for Easter gatherings or any spring celebration. Whether you’re crafting them for a family get-together or just for fun, these cookies are sure to bring smiles. Get ready to roll up your sleeves and enjoy a lovely baking session!
Ingredients
- 2 ¾ cups all-purpose flour
- 1 teaspoon baking powder
- ½ teaspoon salt
- 1 cup unsalted butter, softened
- 1 cup granulated sugar
- 1 large egg
- 1 teaspoon vanilla extract
- 1 ½ cups powdered sugar
- 2-3 tablespoons milk
- Food coloring (pastel colors)
- Sprinkles for decoration
Instructions
- Make the Cookie Dough: In a bowl, whisk together flour, baking powder, and salt. In another large bowl, beat the butter and sugar until creamy. Add the egg and vanilla extract, mixing well. Gradually add the flour mixture until combined.
- Chill the Dough: Divide the dough into two portions, wrap in plastic wrap, and chill in the refrigerator for at least 1 hour.
- Shape and Bake: Preheat the oven to 350°F (175°C). Roll out the dough on a floured surface to about ¼ inch thick. Use flower-shaped cookie cutters to cut out shapes and place them on a baking sheet lined with parchment paper. Bake for 8-10 minutes until the edges are lightly golden.
- Prepare the Frosting: In a bowl, mix powdered sugar with milk until smooth. Divide into smaller bowls and add food coloring to each, mixing to achieve desired pastel shades.
- Decorate the Cookies: Once cookies are completely cool, spread the frosting on top. Add sprinkles or other decorations as desired. Let the frosting set before serving.
Almond Joy Cookie Bars
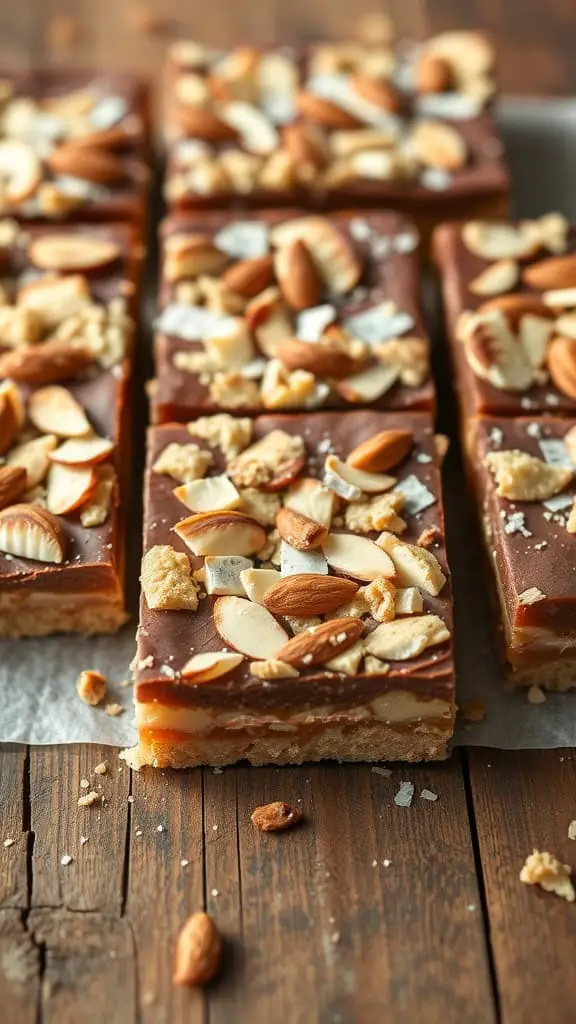
Almond Joy Cookie Bars are a delightful twist on a classic candy bar. Combining the richness of chocolate, the crunch of almonds, and a hint of coconut, these bars deliver a sweet, nutty flavor that’s sure to impress. They are surprisingly straightforward to make, making them a perfect choice for holiday baking or any sweet tooth craving.
The layers of buttery cookie crust, creamy coconut filling, and smooth chocolate topping create a satisfying treat that everyone will love. Whether you’re preparing for Easter festivities or just want to enjoy a sweet snack, these cookie bars are a delightful option.
Ingredients
- 1 cup all-purpose flour
- 1/2 cup unsweetened shredded coconut
- 1/4 cup granulated sugar
- 1/2 cup unsalted butter, softened
- 1 cup sweetened condensed milk
- 1/2 cup semi-sweet chocolate chips
- 1/2 cup chopped almonds
- 1/4 teaspoon salt
Instructions
- Preheat the oven to 350°F (175°C) and line an 8×8 inch baking dish with parchment paper.
- In a mixing bowl, cream together the softened butter and sugar until light and fluffy. Gradually add the flour, shredded coconut, and salt, mixing until well combined.
- Press the dough evenly into the bottom of the prepared baking dish to form the crust.
- Bake the crust for 15-20 minutes, or until lightly golden. Remove from the oven and let cool slightly.
- In a separate bowl, combine the sweetened condensed milk, chocolate chips, and chopped almonds. Pour this mixture over the baked crust.
- Bake for an additional 20-25 minutes until the top is set and bubbly. Allow to cool completely before slicing into bars.
Lemon Zest Shortbread Bunnies

Lemon Zest Shortbread Bunnies are a delightful treat that perfectly embodies the spirit of Easter. These cookies are buttery and melt in your mouth, with a bright lemon flavor that adds a refreshing twist. They are simple to make, making them a fun activity for both kids and adults alike!
The dough comes together quickly, and the bunny shapes add a playful touch. Whether you’re decorating them for an Easter gathering or just enjoying them with a cup of tea, these cookies will surely bring a smile to everyone’s face.
Ingredients
- 2 cups all-purpose flour
- 1/2 cup granulated sugar
- 1 cup unsalted butter, softened
- 1 teaspoon vanilla extract
- 1 tablespoon lemon zest
- 1/4 teaspoon salt
- Powdered sugar for dusting
Instructions
- Make the Dough: In a mixing bowl, cream together the softened butter and sugar until light and fluffy. Add the vanilla extract and lemon zest, mixing until well combined.
- Add Dry Ingredients: Gradually add the flour and salt, mixing until the dough comes together. If it’s too crumbly, you can add a few drops of lemon juice.
- Chill the Dough: Wrap the dough in plastic wrap and refrigerate for at least 30 minutes to firm up.
- Shape the Cookies: Preheat your oven to 350°F (175°C). Roll out the chilled dough on a floured surface to about 1/4-inch thickness. Use a bunny-shaped cookie cutter to cut out the cookies.
- Bake: Place the cookies on a baking sheet lined with parchment paper and bake for 10-12 minutes or until the edges are lightly golden.
- Cool and Serve: Allow the cookies to cool on a wire rack, then dust with powdered sugar before serving.
Carrot Cake Inspired Cookies

These Carrot Cake Inspired Cookies are a delightful twist on a classic dessert. Bursting with the warm flavors of cinnamon and nutmeg, they offer a soft and chewy texture that will make your taste buds dance. Topped with a creamy frosting and adorable little carrot decorations, these cookies are not only delicious but also visually appealing, making them perfect for any Easter celebration.
Making these cookies is quite simple! With just a few basic ingredients, you’ll have a batch of scrumptious treats ready in no time. Plus, the added fun of decorating them makes for a great family activity, bringing everyone together in the kitchen.
Ingredients
- 1 cup all-purpose flour
- 1 teaspoon baking soda
- 1/2 teaspoon baking powder
- 1 teaspoon ground cinnamon
- 1/2 teaspoon ground nutmeg
- 1/4 teaspoon salt
- 1/2 cup unsalted butter, softened
- 1/2 cup brown sugar, packed
- 1/4 cup granulated sugar
- 1 large egg
- 1 teaspoon vanilla extract
- 1 cup grated carrots
- 1/2 cup chopped walnuts (optional)
- 1 cup cream cheese frosting
- Decorative carrot toppers (for decoration)
Instructions
- Preheat your oven to 350°F (175°C) and line a baking sheet with parchment paper.
- In a bowl, whisk together flour, baking soda, baking powder, cinnamon, nutmeg, and salt.
- In a separate bowl, cream together the softened butter, brown sugar, and granulated sugar until smooth. Add the egg and vanilla extract, mixing until well combined.
- Gradually add the dry ingredients to the wet mixture, stirring until just combined. Fold in the grated carrots and chopped walnuts if using.
- Drop tablespoonfuls of dough onto the prepared baking sheet, spacing them about 2 inches apart.
- Bake for 12-15 minutes, or until the edges are lightly golden. Allow to cool on the baking sheet for a few minutes before transferring to a wire rack to cool completely.
- Once cooled, spread cream cheese frosting on top of each cookie and add decorative carrot toppers for a festive touch.
Royal Icing Decorated Eggs
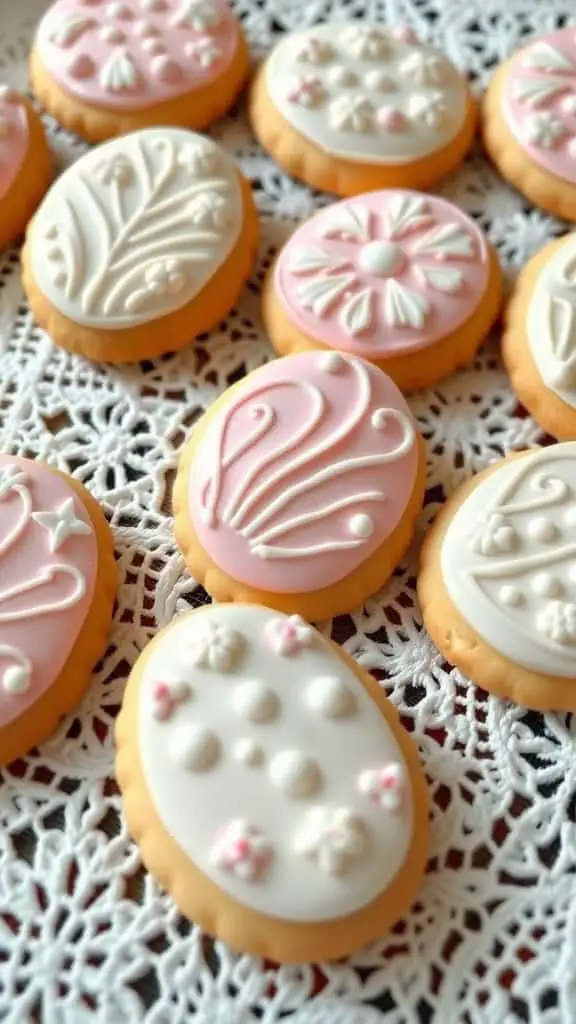
Royal icing decorated eggs are a delightful treat that bring a bit of whimsy to your Easter celebrations. These cookies are not only visually appealing but also have a buttery, melt-in-your-mouth taste that pairs perfectly with the sweet icing. The best part? They’re simple to make, allowing you to unleash your creativity without the stress.
Gather your friends or family for a fun decorating session! Kids love to join in, making it a wonderful activity to bond over. The royal icing adds a shiny finish, making these cookies look professionally made while still being homemade. Now, let’s dive into the recipe!
Ingredients
- 2 ¾ cups all-purpose flour
- 1 teaspoon baking powder
- ½ teaspoon salt
- 1 cup unsalted butter, softened
- 1 cup granulated sugar
- 1 large egg
- 1 teaspoon vanilla extract
- 3 cups powdered sugar
- 2 tablespoons meringue powder
- 5-6 tablespoons water
- Food coloring (optional)
Instructions
- Make the Cookie Dough: In a bowl, whisk together flour, baking powder, and salt. In another bowl, cream butter and sugar until light and fluffy. Beat in the egg and vanilla. Gradually add the flour mixture until combined.
- Chill the Dough: Shape the dough into a disk, wrap in plastic wrap, and refrigerate for at least 1 hour.
- Roll and Cut: Preheat your oven to 350°F (175°C). Roll out the chilled dough on a floured surface to about ¼ inch thick. Cut into egg shapes with a cookie cutter and place on a baking sheet lined with parchment paper.
- Bake the Cookies: Bake for 8-10 minutes, or until the edges are lightly golden. Let cool completely on wire racks.
- Prepare Royal Icing: In a large bowl, combine powdered sugar and meringue powder. Add water a little at a time until you achieve a smooth, spreadable consistency. Divide into bowls and add food coloring if desired.
- Decorate the Cookies: Use piping bags or a squeeze bottle to apply the royal icing to the cooled cookies. Let the icing set before serving or storing.
Decorative Bunny Sugar Cookies

These decorative bunny sugar cookies are a delightful treat that perfectly captures the spirit of Easter. With their sweet vanilla flavor and soft texture, they are sure to be a hit with both kids and adults alike. Plus, decorating them is a fun activity that can bring the whole family together!
Making these cookies is quite easy and doesn’t require any fancy baking skills. The simple sugar cookie dough pairs beautifully with colorful icing, allowing you to create adorable bunny shapes that are as pleasing to the eye as they are to the taste buds. Get ready to add some cheer to your Easter celebration!
Ingredients
- 2 ¾ cups all-purpose flour
- 1 teaspoon baking powder
- ½ teaspoon salt
- 1 cup unsalted butter, softened
- 1 ½ cups granulated sugar
- 1 large egg
- 1 teaspoon vanilla extract
- 1 teaspoon almond extract
- Royal icing (for decoration)
- Food coloring (various colors)
Instructions
- Make the Dough: In a bowl, combine flour, baking powder, and salt. In another bowl, cream together the softened butter and sugar until light and fluffy. Beat in the egg, vanilla, and almond extracts. Gradually mix in the dry ingredients until combined.
- Chill: Divide the dough into two discs, wrap in plastic wrap, and refrigerate for at least 1 hour. This helps the cookies maintain their shape while baking.
- Shape and Bake: Preheat your oven to 350°F (175°C). Roll out the chilled dough on a floured surface to about ¼-inch thickness. Use bunny-shaped cookie cutters to cut out cookies and place them on a baking sheet lined with parchment paper. Bake for 8-10 minutes or until the edges are lightly golden.
- Cool: Let the cookies cool completely on a wire rack before decorating.
- Decorate: Prepare royal icing and divide it into bowls. Add food coloring to each bowl to create vibrant shades. Pipe the icing onto the cooled cookies and allow them to set before serving.
Brightly Colored Jelly Bean Cookies

Brightly colored jelly bean cookies are a delightful treat that brings a burst of color and sweetness to any celebration. These chewy cookies combine a soft, buttery base with a sprinkle of colorful jelly beans, creating a fun and festive dessert that’s perfect for Easter or any spring gathering.
Making these cookies is simple and enjoyable, especially if you’re baking with kids. The bright jelly beans not only add flavor but also make these cookies visually appealing. Everyone will love the chewy, sweet bites filled with surprises!
Ingredients
- 1 cup unsalted butter, softened
- 1 cup granulated sugar
- 2 large eggs
- 2 teaspoons vanilla extract
- 3 cups all-purpose flour
- 1 teaspoon baking soda
- 1/2 teaspoon salt
- 1 cup assorted jelly beans
Instructions
- Preheat your oven to 350°F (175°C) and line a baking sheet with parchment paper.
- In a large bowl, cream together the softened butter and sugar until light and fluffy. Beat in the eggs one at a time, then stir in the vanilla.
- In another bowl, whisk together the flour, baking soda, and salt. Gradually add this to the butter mixture, mixing until well combined.
- Gently fold in the jelly beans until evenly distributed throughout the dough.
- Drop rounded tablespoons of dough onto the prepared baking sheet, leaving space between each cookie.
- Bake for 10-12 minutes, or until the edges are lightly golden. Allow them to cool on the baking sheet for a few minutes before transferring to a wire rack to cool completely.
Springtime Flower Petal Cookies
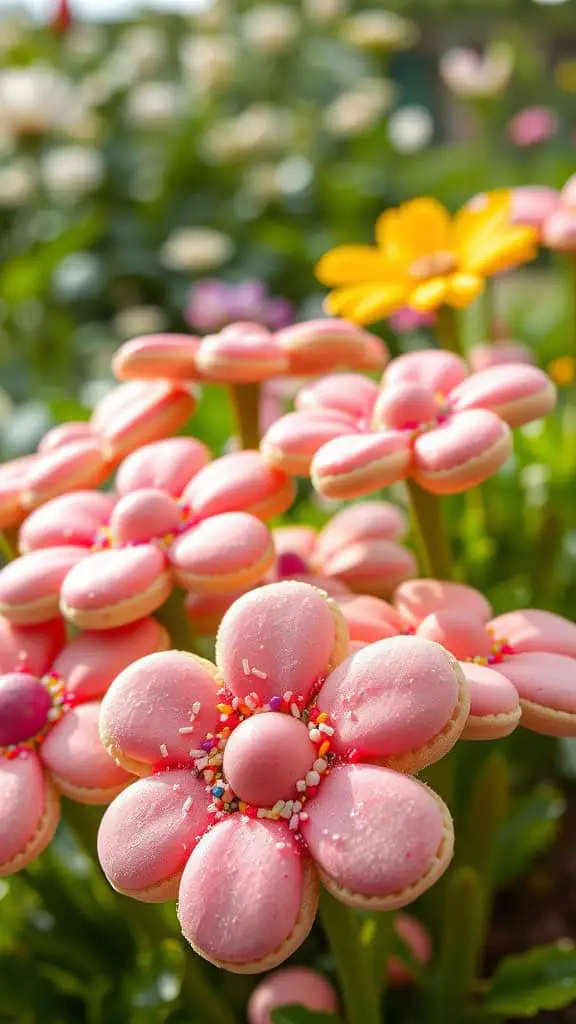
Springtime Flower Petal Cookies bring a delightful burst of color and flavor to your Easter celebrations. These charming cookies are not only pleasing to the eye but also offer a lovely blend of sweetness and a touch of creaminess from the filling. They are surprisingly simple to make and perfect for decorating with kids!
The cookies are made with a tender base that complements the vibrant toppings, making them a joy to eat. Whether you’re hosting a spring gathering or seeking a fun baking project, these cookies are sure to brighten up your day. Let’s get to the recipe!
Ingredients
- 2 ½ cups all-purpose flour
- 1 cup unsalted butter, softened
- 1 cup granulated sugar
- 2 large eggs
- 1 teaspoon vanilla extract
- 1 teaspoon baking powder
- ¼ teaspoon salt
- Food coloring (various colors)
- Sprinkles for decoration
Instructions
- Prepare the Dough: In a large mixing bowl, beat together the softened butter and sugar until light and fluffy. Add in the eggs and vanilla, mixing well. Gradually incorporate the flour, baking powder, and salt until a dough forms.
- Color the Dough: Divide the dough into portions and add different food coloring to each part. Mix until you achieve your desired colors.
- Shape the Cookies: Roll out each portion of colored dough and use flower-shaped cookie cutters to cut out the cookies. Use smaller cutters to make petals and centers for your flowers.
- Bake: Preheat your oven to 350°F (175°C). Arrange the cookies on a baking sheet lined with parchment paper and bake for 8-10 minutes until lightly golden. Let them cool completely.
- Decorate: Once cooled, assemble the flower cookies by stacking the petals and centers. Use icing or melted chocolate to secure each piece, and finish with sprinkles for a festive touch.
Peanut Butter Blossom Bunnies

Peanut Butter Blossom Bunnies are a delightful twist on the classic peanut butter cookie. These cookies combine the rich, nutty flavor of peanut butter with a playful bunny shape, making them a fun treat for Easter celebrations. They’re soft, chewy, and topped with a chocolate kiss that adds a sweet touch.
This recipe is easy to make and perfect for baking with kids. You’ll enjoy the simple steps, and the delightful aroma of these cookies baking will fill your kitchen. It’s a great way to bring some holiday cheer to your dessert table!
Ingredients
- 1 cup creamy peanut butter
- 1 cup granulated sugar
- 1 large egg
- 1 teaspoon vanilla extract
- 1/2 teaspoon baking soda
- 1/4 teaspoon salt
- 1 cup chocolate kisses, unwrapped
- 1/4 cup mini chocolate chips (optional for decoration)
Instructions
- Preheat the oven to 350°F (175°C) and line a baking sheet with parchment paper.
- In a mixing bowl, combine the peanut butter, granulated sugar, egg, vanilla extract, baking soda, and salt. Stir until the mixture is well blended.
- Using a tablespoon, scoop out dough and form into small balls. Place them on the prepared baking sheet, spacing them about 2 inches apart.
- Bake for 10-12 minutes, or until the edges are lightly golden. Remove from the oven and let them cool for a few minutes on the baking sheet.
- While still warm, gently press a chocolate kiss into the center of each cookie. If desired, sprinkle mini chocolate chips around the kisses for added decoration.
- Allow the cookies to cool completely on a wire rack before serving.
Marbleized Easter Egg Cookies

Marbleized Easter Egg Cookies are a delightful treat that combines the sweetness of sugar cookies with colorful, swirled icing. They’re not only tasty but also visually stunning, making them a perfect addition to your Easter festivities. With a light vanilla flavor and a soft, buttery texture, these cookies are sure to please both kids and adults alike.
The best part? They’re simple to make! Even if you’re not a baking expert, you can create these charming cookies with just a few easy steps. Gather your ingredients, unleash your creativity with the icing, and get ready to impress your friends and family this Easter!
Ingredients
- 2 3/4 cups all-purpose flour
- 1 teaspoon baking powder
- 1/2 teaspoon salt
- 1 cup unsalted butter, softened
- 1 1/4 cups granulated sugar
- 1 large egg
- 1 teaspoon vanilla extract
- 3 cups powdered sugar
- 4 tablespoons milk
- Food coloring (various colors)
Instructions
- Prepare the Dough: In a bowl, whisk together flour, baking powder, and salt. In a separate bowl, cream the butter and sugar until light and fluffy. Add the egg and vanilla, mixing well. Gradually add the dry ingredients to the wet mixture until combined.
- Shape and Chill: Roll the dough into a log, wrap it in plastic wrap, and refrigerate for at least 1 hour. This will make it easier to cut.
- Cut and Bake: Preheat the oven to 350°F (175°C). Slice the chilled dough into 1/4-inch thick rounds and place them on a baking sheet lined with parchment paper. Bake for about 8-10 minutes, or until the edges are lightly golden.
- Prepare the Icing: In a bowl, mix powdered sugar with milk until smooth. Divide the icing into separate bowls and add food coloring to each to create your desired colors.
- Marbleize the Icing: To create the marbled effect, drizzle different colored icings on top of the cookies and use a toothpick to swirl them together. Allow the icing to set before serving.
Marshmallow Fluff Egg Cookies

These Marshmallow Fluff Egg Cookies are a delightful treat that combines soft, chewy cookie bases with fluffy toppings. The sweetness of marshmallow fluff pairs perfectly with a chocolate egg, making them a fun addition to any Easter celebration. They’re easy to make, so even those who aren’t seasoned bakers can whip them up in no time.
With their bright and festive appearance, these cookies will surely bring a smile to everyone’s face. They have a light and airy texture, complemented by a rich chocolatey flavor, making them a perfect springtime dessert to share with family and friends.
Ingredients
- 1 cup all-purpose flour
- 1/2 cup granulated sugar
- 1/4 cup butter, softened
- 1 large egg
- 1 teaspoon vanilla extract
- 1/2 teaspoon baking powder
- 1/4 teaspoon salt
- 1 cup marshmallow fluff
- 10-12 chocolate eggs (such as Cadbury mini eggs)
Instructions
- Preheat the oven to 350°F (175°C) and line a baking sheet with parchment paper.
- In a mixing bowl, cream together the softened butter and sugar until light and fluffy. Add the egg and vanilla extract, mixing until well combined.
- In another bowl, whisk together the flour, baking powder, and salt. Gradually add the dry ingredients to the wet mixture, stirring until just combined.
- Drop spoonfuls of dough onto the prepared baking sheet, spacing them about 2 inches apart. Bake for 10-12 minutes or until the edges are lightly golden.
- Once the cookies are out of the oven, let them cool for a few minutes. Then, using the back of a spoon, make a small indentation in the center of each cookie.
- Fill each indentation with a generous dollop of marshmallow fluff and gently press a chocolate egg into the center. Allow the cookies to cool completely before serving.
Carrot Patch Cookie Cups
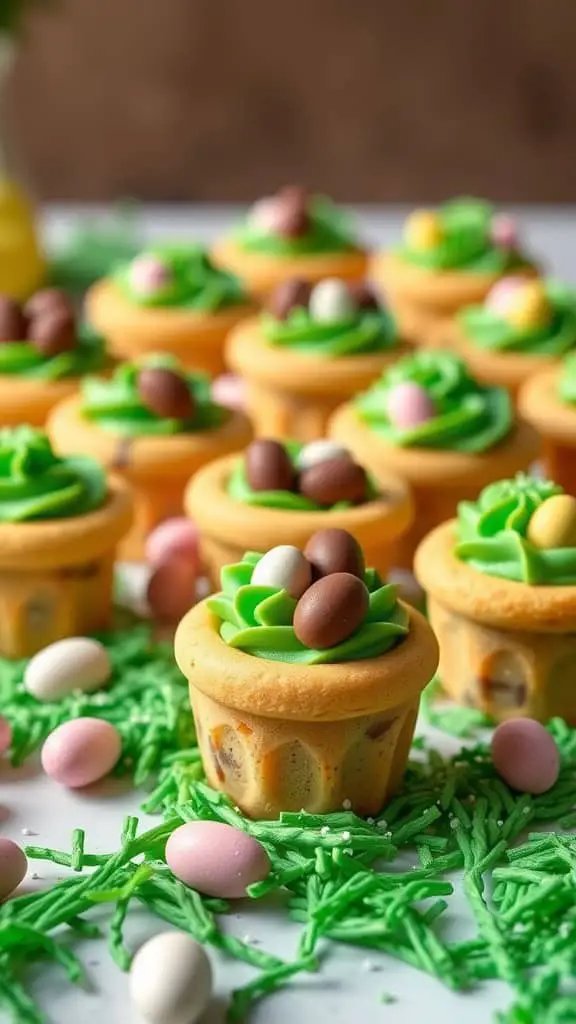
Carrot Patch Cookie Cups are a delightful treat that perfectly captures the spirit of Easter. These cookie cups are soft and chewy, filled with a sweet green frosting designed to mimic grass, topped with colorful chocolate eggs. They offer a fun and whimsical presentation that kids and adults alike will love.
Making these cookie cups is an enjoyable experience, as they are simple to prepare. With just a few steps, you’ll create adorable little desserts that are sure to impress your family and friends during the holiday season.
Ingredients
- 1 cup unsalted butter, softened
- 1 cup granulated sugar
- 1 cup brown sugar, packed
- 2 large eggs
- 2 teaspoons vanilla extract
- 3 cups all-purpose flour
- 1 teaspoon baking soda
- 1/2 teaspoon salt
- 1 cup chocolate chips
- 1 cup green frosting (store-bought or homemade)
- Chocolate eggs for topping
Instructions
- Preheat your oven to 350°F (175°C) and grease a muffin tin.
- In a large bowl, cream together the softened butter, granulated sugar, and brown sugar until light and fluffy. Beat in the eggs and vanilla extract.
- In another bowl, whisk together the flour, baking soda, and salt. Gradually add the dry ingredients to the wet mixture, mixing until just combined. Stir in the chocolate chips.
- Scoop spoonfuls of dough into the greased muffin tin, pressing down slightly to form cups. Bake for 12-15 minutes, or until the edges are golden brown.
- Allow the cookie cups to cool completely before frosting. Once cooled, pipe or spread the green frosting onto each cookie cup to resemble grass, and add chocolate eggs on top for decoration.
Nutty Oatmeal Carrot Cookies

Nutty Oatmeal Carrot Cookies are a delightful twist on traditional cookies, combining the wholesome flavors of oats and carrots with a nutty crunch. They are not only tasty but also simple to make, making them a fun baking project for anyone.
The cookies have a soft, chewy texture, thanks to the oats and carrots, and a satisfying crunch from the nuts. Perfect for Easter celebrations or any spring gathering, they are sure to bring smiles to the table!
Ingredients
- 1 cup all-purpose flour
- 1 cup rolled oats
- 1/2 cup brown sugar, packed
- 1/4 cup granulated sugar
- 1/2 teaspoon baking soda
- 1/2 teaspoon baking powder
- 1/4 teaspoon salt
- 1 teaspoon ground cinnamon
- 1/2 cup unsalted butter, softened
- 1 large egg
- 1 teaspoon vanilla extract
- 1 cup grated carrots
- 1/2 cup chopped nuts (such as pecans or walnuts)
Instructions
- Preheat the oven to 350°F (175°C) and line a baking sheet with parchment paper.
- In a large bowl, mix together the flour, oats, brown sugar, granulated sugar, baking soda, baking powder, salt, and cinnamon.
- Add the softened butter, egg, and vanilla extract to the dry ingredients. Stir until well combined.
- Fold in the grated carrots and chopped nuts until evenly distributed.
- Drop spoonfuls of dough onto the prepared baking sheet, spacing them a few inches apart.
- Bake for 12-15 minutes or until the edges are lightly golden. Let cool on the baking sheet for a few minutes before transferring to a wire rack to cool completely.
Vanilla Bean Rabbit Silhouettes

These Vanilla Bean Rabbit Silhouettes are a delightful treat that captures the spirit of Easter. They are sweet, buttery, and infused with the rich flavor of vanilla bean, making each bite a simple pleasure. The cookies are easy to make, making them a fun project for both novice and experienced bakers alike.
Not only do they taste great, but they also look charming on any festive table. Decorate them with icing or sprinkles to add a personal touch, and share them with family and friends for a lovely holiday treat.
Ingredients
- 2 3/4 cups all-purpose flour
- 1 teaspoon baking powder
- 1/2 teaspoon salt
- 1 cup unsalted butter, softened
- 1 cup granulated sugar
- 1 large egg
- 1 tablespoon vanilla bean paste
- 1 teaspoon vanilla extract
Instructions
- Prepare the Dough: In a bowl, mix flour, baking powder, and salt. In another bowl, cream together butter and sugar until light and fluffy. Beat in the egg, vanilla bean paste, and vanilla extract.
- Combine Ingredients: Gradually mix the dry ingredients into the wet ingredients until a dough forms. Wrap the dough in plastic wrap and chill for at least 1 hour.
- Shape the Cookies: Preheat your oven to 350°F (175°C). Roll out the dough on a floured surface to about 1/4-inch thickness. Cut out rabbit shapes using a cookie cutter.
- Bake the Cookies: Place the cookies on a baking sheet lined with parchment paper. Bake for 8-10 minutes, or until the edges are lightly golden. Let them cool on a wire rack.
- Decorate: Once cool, you can decorate the cookies with icing or leave them plain to enjoy their vanilla flavor.
S’mores Inspired Easter Cookies
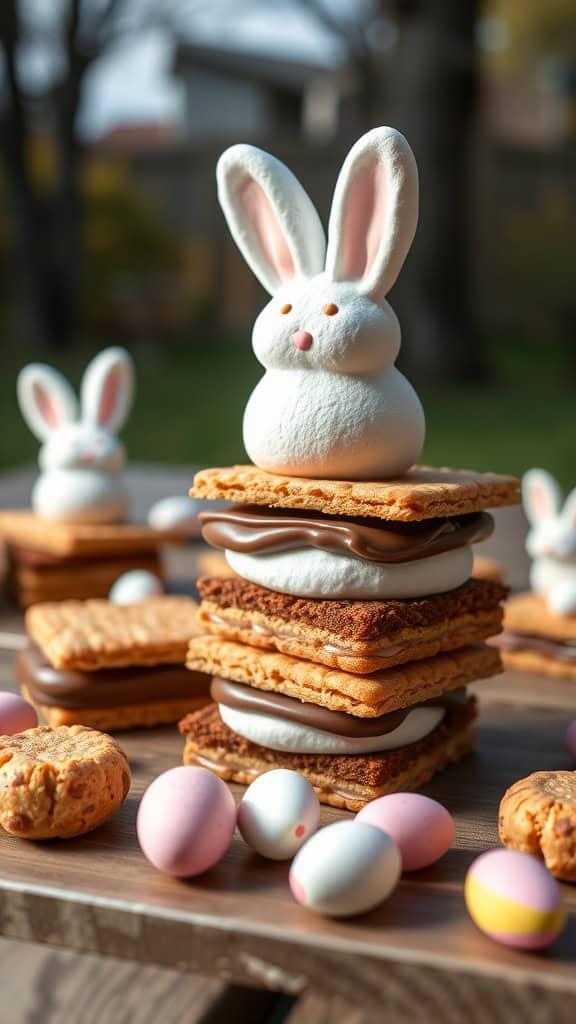
These S’mores Inspired Easter Cookies combine the nostalgic flavors of classic s’mores with fun, festive elements perfect for the holiday. The delightful mix of graham crackers, gooey marshmallows, and rich chocolate creates a sweet treat that’s sure to please all ages. Plus, they’re simple to make, allowing you to whip them up in no time for your Easter celebrations!
These cookies not only taste delicious but also bring a playful element to your dessert table. With bunny-shaped marshmallows nestled between layers of graham crackers and chocolate, these treats are as adorable as they are tasty. Get ready to enjoy a yummy twist on a classic favorite!
Ingredients
- 1 package of graham crackers
- 1 cup chocolate chips
- 3 large marshmallows
- 1/2 teaspoon vanilla extract
- 1/4 cup mini chocolate eggs (for decoration)
- Colored icing (for decorating the bunnies)
Instructions
- Preheat your oven to 350°F (175°C) and line a baking sheet with parchment paper.
- Break the graham crackers into squares and place half of them on the baking sheet.
- Melt the chocolate chips in a microwave-safe bowl, stirring every 30 seconds until smooth.
- Spread a layer of melted chocolate onto each graham cracker square on the baking sheet.
- Cut the marshmallows in half and place a half on top of each chocolate-covered cracker.
- Bake in the preheated oven for about 5 minutes, or until the marshmallows are soft and slightly golden.
- Remove from the oven and immediately press another graham cracker square on top to create a sandwich.
- Let cool for a minute, then use colored icing to decorate the marshmallows like bunnies.
- Finish with a sprinkle of mini chocolate eggs around the cookies for an extra festive touch.
Mini Egg Stuffed Biscuit Cookies
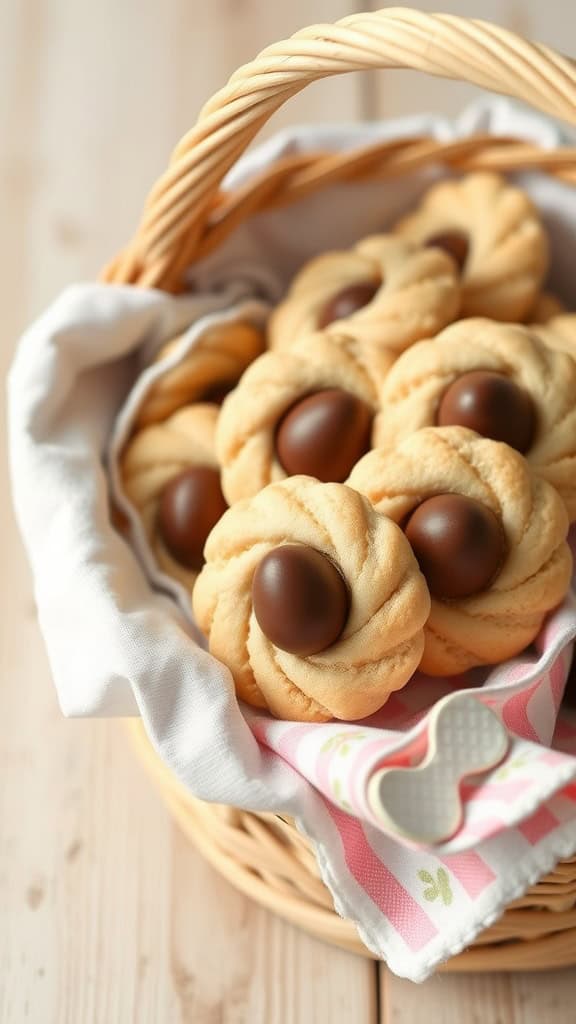
Mini Egg Stuffed Biscuit Cookies are a delightful treat that perfectly captures the spirit of Easter. These cookies have a buttery, melt-in-your-mouth texture and are filled with chocolate mini eggs, making each bite a sweet surprise. They are simple to make, allowing you to whip them up without too much fuss, making them an enjoyable addition to any spring celebration.
These cookies not only taste delicious but also look festive, adding a touch of color to your dessert table. Whether you’re making them for an Easter gathering or just to enjoy at home, these cookies are sure to bring smiles to everyone’s faces!
Ingredients
- 2 cups all-purpose flour
- 1/2 cup granulated sugar
- 1 teaspoon baking powder
- 1/4 teaspoon salt
- 1/2 cup unsalted butter, softened
- 1 large egg
- 1 teaspoon vanilla extract
- 1 cup mini chocolate eggs
Instructions
- Preheat the Oven: Start by preheating your oven to 350°F (175°C) and lining a baking sheet with parchment paper.
- Mix the Dry Ingredients: In a medium bowl, whisk together flour, sugar, baking powder, and salt until well combined.
- Prepare the Dough: In a large bowl, beat the softened butter until creamy. Add the egg and vanilla extract, mixing until smooth. Gradually add the dry ingredients to the wet mixture, stirring until a dough forms.
- Shape the Cookies: Take small portions of dough and flatten them in your palm. Add a mini chocolate egg in the center, then fold the dough around the egg, sealing it completely. Roll into a ball and place on the prepared baking sheet.
- Bake: Bake for 10-12 minutes or until the edges are lightly golden. Let them cool on the baking sheet for a few minutes before transferring them to a wire rack to cool completely.
Fruity Pebbles Easter Cookies

Fruity Pebbles Easter Cookies are a fun twist on traditional cookies, bringing a burst of color and fruity flavor to your holiday celebrations. These cookies are chewy, sweet, and packed with a delightful crunch from the cereal, making them a playful treat that both kids and adults will love.
The best part? They’re easy to whip up! With simple ingredients and minimal prep time, you can have these cheerful cookies ready for any Easter gathering. Their bright colors and sweet flavor are sure to bring smiles all around!
Ingredients
- 1 cup unsalted butter, softened
- 1 cup granulated sugar
- 1 cup brown sugar, packed
- 2 large eggs
- 2 teaspoons vanilla extract
- 3 cups all-purpose flour
- 1 teaspoon baking soda
- 1/2 teaspoon salt
- 2 cups Fruity Pebbles cereal
- 1/2 cup chocolate chips (optional)
Instructions
- Preheat the oven to 350°F (175°C). Line a baking sheet with parchment paper.
- In a large bowl, cream together the softened butter, granulated sugar, and brown sugar until fluffy.
- Add the eggs and vanilla extract, mixing well until combined.
- In another bowl, whisk together the flour, baking soda, and salt. Gradually add this dry mixture to the wet mixture, stirring until fully combined.
- Fold in the Fruity Pebbles cereal and chocolate chips if using.
- Drop rounded tablespoons of dough onto the prepared baking sheet, spacing them about 2 inches apart.
- Bake for 10-12 minutes, or until the edges are lightly golden. Let them cool on the baking sheet for a few minutes before transferring to a wire rack to cool completely.
Raspberry Jam Thumbprint Cookies

Raspberry Jam Thumbprint Cookies are a delightful treat that perfectly blend a buttery, crumbly cookie with a sweet and tart raspberry filling. These cookies are not only tasty but also easy to make, making them a fun baking project for both novice and experienced bakers. The thumbprint design adds a charming touch, making them ideal for Easter celebrations or any festive gathering.
The combination of buttery cookie and tangy raspberry jam creates a satisfying flavor that balances sweetness with a hint of tartness. Each bite melts in your mouth, offering a delicious way to celebrate the season. Plus, they look lovely on any dessert table!
Ingredients
- 1 cup unsalted butter, softened
- 1/2 cup granulated sugar
- 2 cups all-purpose flour
- 1/4 teaspoon salt
- 1/2 teaspoon vanilla extract
- 1/2 cup raspberry jam
Instructions
- Preheat the oven to 350°F (175°C) and line a baking sheet with parchment paper.
- In a large bowl, cream together the softened butter and sugar until light and fluffy.
- Mix in the flour and salt until just combined. Add the vanilla extract and stir until the dough comes together.
- Roll the dough into small balls (about 1 inch in diameter) and place them on the prepared baking sheet, spacing them about 2 inches apart.
- Using your thumb or the back of a spoon, make an indent in the center of each ball. Fill each thumbprint with a small amount of raspberry jam.
- Bake for 12-15 minutes, or until the edges are lightly golden. Allow the cookies to cool on the pan for a few minutes before transferring them to a wire rack to cool completely.

Lila Ashford is the creator of Tofu Moo Recipes, where she shares her love for indulgent desserts, refreshing drinks, and irresistible snacks. With a passion for simple pleasures and a flair for cozy elegance, Lila hopes to inspire moments of joy in every bite. Follow her for more delightful creations!

