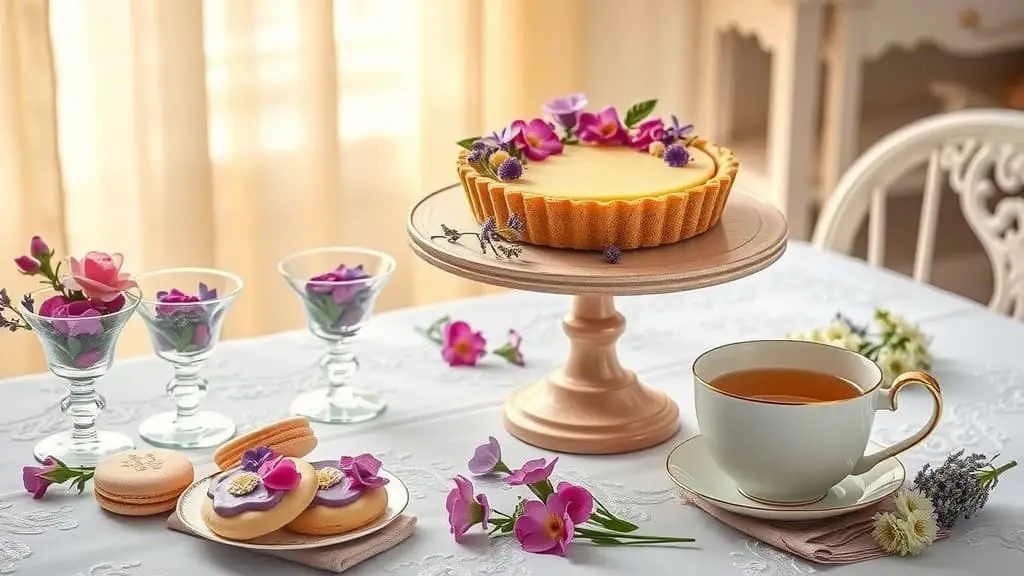
If you’re looking to add a sprinkle of elegance to your dessert table, flower-inspired treats are the way to go. Imagine delicate sugar cookies adorned with beautiful floral designs and a creamy floral panna cotta that delights the senses. These desserts not only taste delightful but also bring a vibrant touch to any occasion. Let’s dive into some simple yet charming recipes that will elevate your dessert game!
Flower-Inspired Sugar Cookies
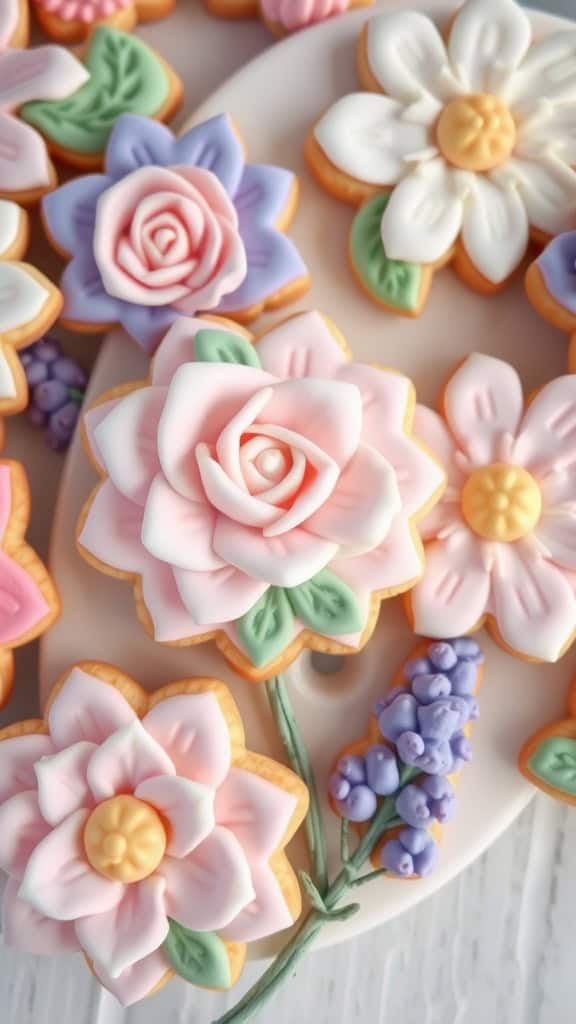
Flower-inspired sugar cookies are a delightful treat that not only taste sweet but also look like little pieces of art. These cookies have a buttery flavor and a crisp texture, making them perfect for any occasion, from tea parties to celebrations. With a simple recipe, even novice bakers can create these decorative delights.
Decorating sugar cookies with floral designs adds a charming touch, allowing for creativity with various colors and shapes. The combination of soft icing and vibrant designs makes them not only a joy to eat but also a feast for the eyes.
Ingredients
- 2 ¾ cups all-purpose flour
- 1 teaspoon baking powder
- ¼ teaspoon salt
- 1 cup unsalted butter, softened
- 1 ½ cups granulated sugar
- 1 large egg
- 1 teaspoon vanilla extract
- 1 teaspoon almond extract (optional)
- Royal icing for decoration
- Food coloring (various colors)
Instructions
- Prepare the Dough: In a bowl, mix flour, baking powder, and salt. In another bowl, cream the softened butter and sugar until light and fluffy. Beat in the egg and extracts. Gradually add the dry ingredients until combined.
- Chill the Dough: Wrap the dough in plastic wrap and refrigerate for at least 2 hours or overnight for easier rolling.
- Roll and Cut: Preheat your oven to 350°F (175°C). Roll out the chilled dough on a floured surface to about ¼ inch thick. Use flower-shaped cookie cutters to cut out shapes and place them on a baking sheet lined with parchment paper.
- Bake: Bake for 8-10 minutes or until the edges are lightly golden. Allow cookies to cool on a wire rack.
- Decorate: Once cooled, use royal icing to decorate the cookies with floral designs. Feel free to use food coloring to create various hues for your flowers.
Lavender Honey Panna Cotta
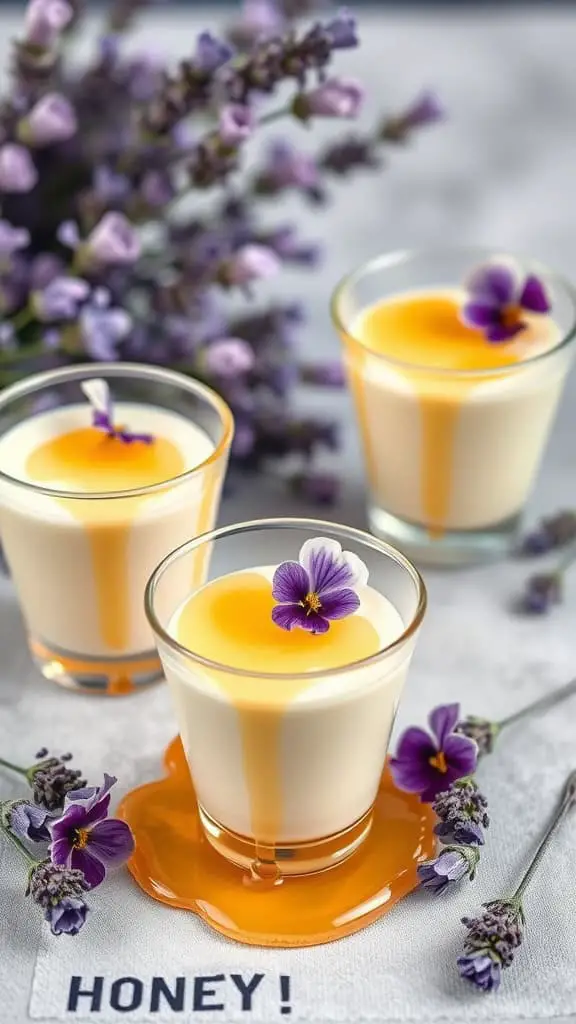
Lavender honey panna cotta is a delightful dessert that beautifully combines the floral notes of lavender with the sweetness of honey. This creamy treat has a smooth texture that’s light yet satisfying, making it a perfect ending to any meal. With its elegant presentation and subtle flavors, it’s sure to impress your guests.
What’s great about this recipe is its simplicity. You only need a few ingredients, and the steps are straightforward. Whether you’re a seasoned baker or a novice, you can whip this up without a hitch. Enjoy the process of making this lovely dessert!
Ingredients
- 2 cups heavy cream
- 1/2 cup milk
- 1/2 cup honey
- 1 tablespoon dried lavender buds
- 1 envelope (2 1/4 teaspoons) unflavored gelatin
- 1/4 cup cold water
- 1 teaspoon vanilla extract
- Fresh lavender sprigs for garnish (optional)
Instructions
- Infuse the Cream: In a saucepan, combine the heavy cream, milk, honey, and lavender buds. Heat gently over medium heat until it begins to simmer. Remove from heat and let it steep for about 15 minutes.
- Prepare the Gelatin: In a small bowl, sprinkle the gelatin over the cold water. Let it sit for about 5 minutes until it blooms.
- Combine Ingredients: Strain the lavender-infused cream mixture through a fine mesh sieve to remove the buds. While still warm, stir in the bloomed gelatin and vanilla extract until fully dissolved.
- Chill: Pour the mixture into serving glasses and refrigerate for at least 4 hours, or until set.
- Serve: Once set, garnish with fresh lavender sprigs if desired, and drizzle with additional honey before serving.
Rose Petal Shortbread Cookies
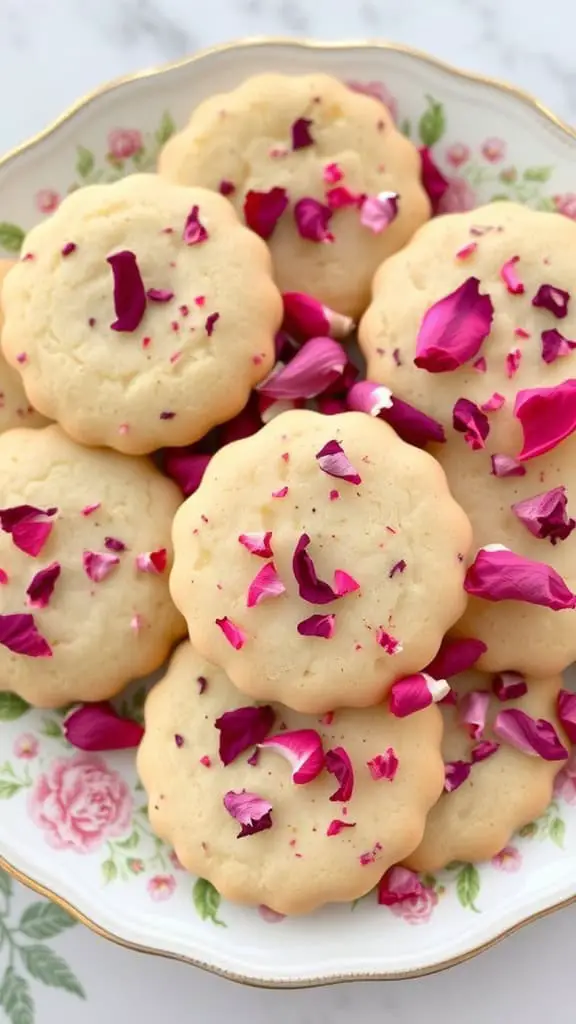
Rose Petal Shortbread Cookies are a delightful treat that combines the rich, buttery flavor of shortbread with the subtle floral notes of rose petals. These cookies are not only tasty but also visually appealing, making them a lovely addition to any gathering or afternoon tea. The delicate essence of rose adds a unique twist that’s sure to impress your guests.
Making these cookies is quite simple, making it a great recipe for bakers of all levels. With just a few ingredients and minimal steps, you can create a batch of cookies that look and taste elegant. Let’s dive into the recipe!
Ingredients
- 2 cups all-purpose flour
- 1/2 cup powdered sugar
- 1 cup unsalted butter, softened
- 1/4 teaspoon salt
- 1 tablespoon dried edible rose petals, crushed
- 1 teaspoon vanilla extract
Instructions
- Prepare the Dough: In a large mixing bowl, cream together the softened butter and powdered sugar until light and fluffy. Add in the vanilla extract and mix well.
- Combine Ingredients: Gradually sift in the flour and salt, mixing until just combined. Gently fold in the crushed rose petals.
- Chill the Dough: Divide the dough into two portions, shape them into logs, and wrap in plastic wrap. Chill in the refrigerator for about 1 hour until firm.
- Preheat the Oven: Preheat your oven to 350°F (175°C). Line a baking sheet with parchment paper.
- Slice and Bake: Remove the dough from the refrigerator and slice into 1/4-inch thick rounds. Place them on the prepared baking sheet, spacing them about an inch apart. Bake for 12-15 minutes or until the edges are lightly golden.
- Cool and Serve: Allow the cookies to cool on the baking sheet for a few minutes before transferring them to a wire rack to cool completely. Enjoy your rose petal shortbread cookies with a cup of tea!
Violet Macarons
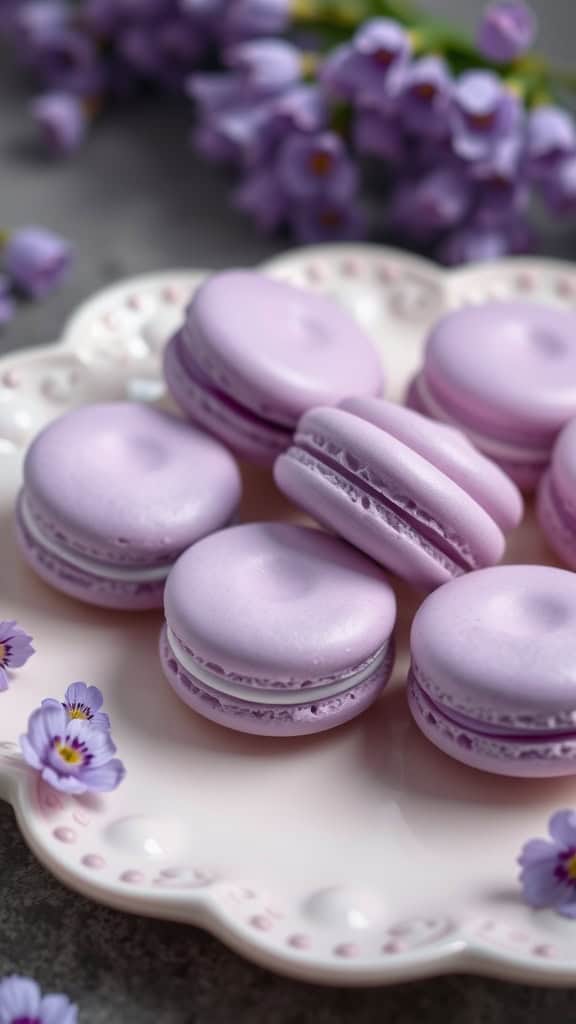
Violet macarons are a delightful treat that brings a touch of elegance to any dessert table. These delicate French cookies are made with almond flour and a hint of violet flavor, creating a light and airy texture that melts in your mouth. The subtle floral notes make them not just a feast for the eyes, but also a treat for your taste buds.
Making macarons can seem a bit daunting, but with a little patience and practice, you’ll find it quite manageable. The vibrant violet color adds a charming twist to the classic macaron, making them perfect for special occasions or simply to brighten up your day.
Ingredients
- 1 cup almond flour
- 1 3/4 cups powdered sugar
- 3 large egg whites, at room temperature
- 1/4 cup granulated sugar
- 1 teaspoon violet extract
- 1/4 teaspoon cream of tartar
- Food coloring (purple)
- 1/2 cup unsalted butter, softened
- 1 1/2 cups powdered sugar (for filling)
- 2 tablespoons milk
Instructions
- Prepare the Dry Ingredients: In a bowl, sift together almond flour and powdered sugar to eliminate any lumps.
- Whip the Egg Whites: In a separate bowl, beat the egg whites until foamy. Add the cream of tartar and gradually add the granulated sugar. Continue beating until stiff peaks form.
- Add Flavor and Color: Gently fold in the violet extract and a few drops of purple food coloring to the egg white mixture.
- Combine Mixtures: Carefully fold the dry ingredients into the egg whites, mixing until the batter flows like lava and forms a figure-eight without breaking.
- Piping: Transfer the batter to a piping bag and pipe small circles onto a lined baking sheet. Let them sit at room temperature for 30 minutes to form a skin.
- Bake: Preheat the oven to 300°F (150°C). Bake the macarons for 15-20 minutes, or until they have a smooth shell and lift easily off the baking sheet.
- Make the Filling: In a bowl, beat the softened butter until creamy. Gradually add powdered sugar and milk, mixing until smooth and fluffy.
- Assemble: Once the macarons are cool, pipe the violet buttercream filling onto the flat side of one shell and sandwich with another shell.
Hibiscus Cheesecake
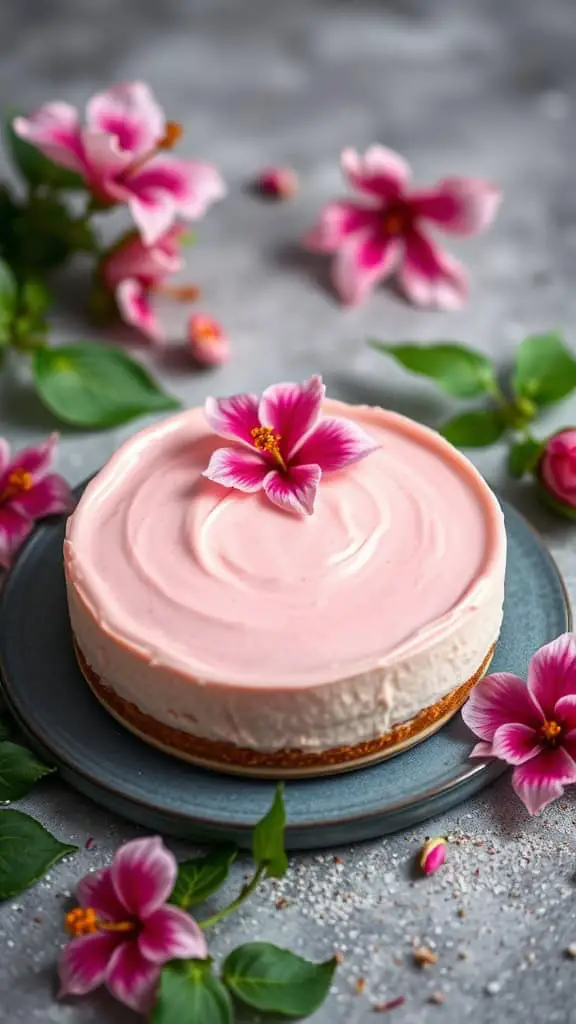
Hibiscus cheesecake is a delightful dessert that brings a floral twist to the classic cheesecake. With its smooth, creamy texture and subtly tart flavor from the hibiscus, it offers a refreshing taste that’s perfect for any occasion. Making this cheesecake is quite straightforward, making it an enjoyable project for both novice and experienced bakers.
The vibrant pink hue and the aromatic scent of hibiscus not only make it visually appealing but also elevate your dessert game. It’s a lovely addition to any gathering, and you might find it’s a favorite among your friends and family!
Ingredients
- 1 ½ cups graham cracker crumbs
- ½ cup unsalted butter, melted
- 1 cup granulated sugar
- 4 (8 oz) packages cream cheese, softened
- 1 cup heavy cream
- 1 cup hibiscus tea, brewed and cooled
- 1 tablespoon gelatin powder
- 2 tablespoons water
- 1 teaspoon vanilla extract
- Pinch of salt
Instructions
- Prepare the Crust: Preheat your oven to 350°F (175°C). In a bowl, mix graham cracker crumbs and melted butter until combined. Press this mixture into the bottom of a 9-inch springform pan and bake for 10 minutes. Let it cool.
- Make the Filling: In a large mixing bowl, combine softened cream cheese and sugar. Beat until smooth. Gradually add the heavy cream, hibiscus tea, vanilla extract, and salt. Mix until fully incorporated.
- Dissolve the Gelatin: In a small bowl, combine gelatin powder with water. Let it sit for about 5 minutes, then warm it gently until dissolved. Mix this into the cheesecake filling.
- Combine and Chill: Pour the filling over the cooled crust. Smooth the top and refrigerate for at least 4 hours, or until set.
- Serve: Once set, remove from the springform pan, slice, and enjoy your hibiscus cheesecake!
Jasmine Tea Cupcakes
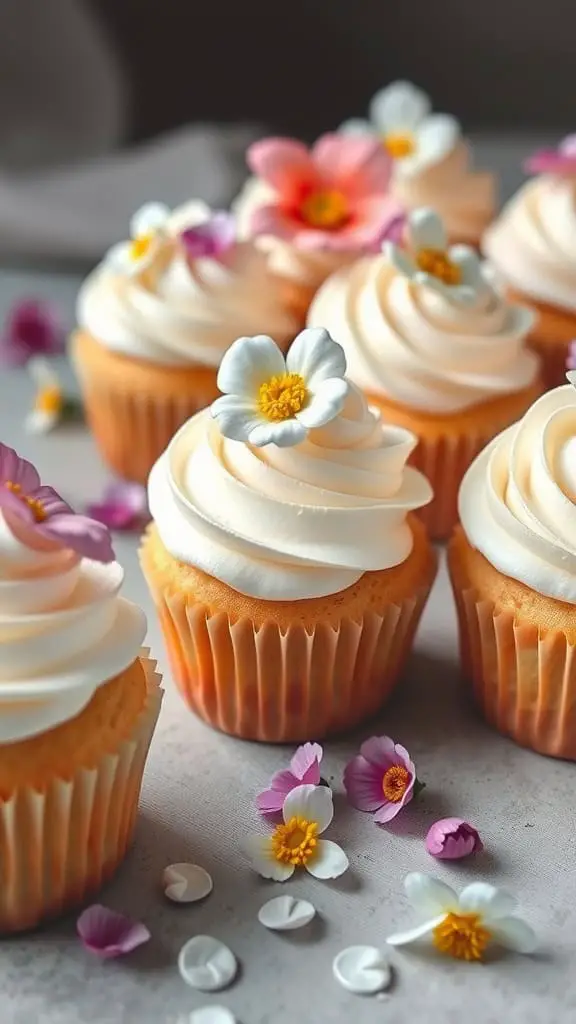
Jasmine tea cupcakes bring a delicate floral flavor to your dessert table, making them an elegant choice for any occasion. The soft vanilla base infused with jasmine tea offers a unique twist that pairs beautifully with the light and fluffy frosting.
These cupcakes are surprisingly simple to make, perfect for both novice bakers and experienced ones looking for a refreshing change. Each bite melts in your mouth, leaving you with a hint of floral sweetness that’s both soothing and delightful.
Ingredients
- 1 cup all-purpose flour
- 1/2 cup granulated sugar
- 1/2 cup unsalted butter, softened
- 2 large eggs
- 1/2 cup milk
- 2 tablespoons jasmine tea leaves (or 2 teabags)
- 1 teaspoon baking powder
- 1/4 teaspoon salt
- 1 teaspoon vanilla extract
- 1 cup heavy cream
- 1/4 cup powdered sugar
- Fresh edible flowers for decoration
Instructions
- Preheat your oven to 350°F (175°C) and line a cupcake tin with liners.
- In a small saucepan, heat the milk until just simmering. Remove from heat, add the jasmine tea leaves, and let steep for 5 minutes. Strain and let cool slightly.
- In a mixing bowl, cream the softened butter and granulated sugar together until light and fluffy. Add in the eggs one at a time, mixing well after each addition. Stir in the cooled jasmine-infused milk and vanilla extract.
- In another bowl, whisk together the flour, baking powder, and salt. Gradually add the dry ingredients to the wet mixture until just combined.
- Pour the batter into the prepared cupcake liners, filling each about 2/3 full. Bake for 18-20 minutes, or until a toothpick inserted into the center comes out clean. Let them cool completely.
- While the cupcakes are cooling, whip the heavy cream with powdered sugar until soft peaks form. Frost the cooled cupcakes generously with the whipped cream.
- Garnish each cupcake with fresh edible flowers for a beautiful, floral touch before serving.
Chamomile Honey Cake
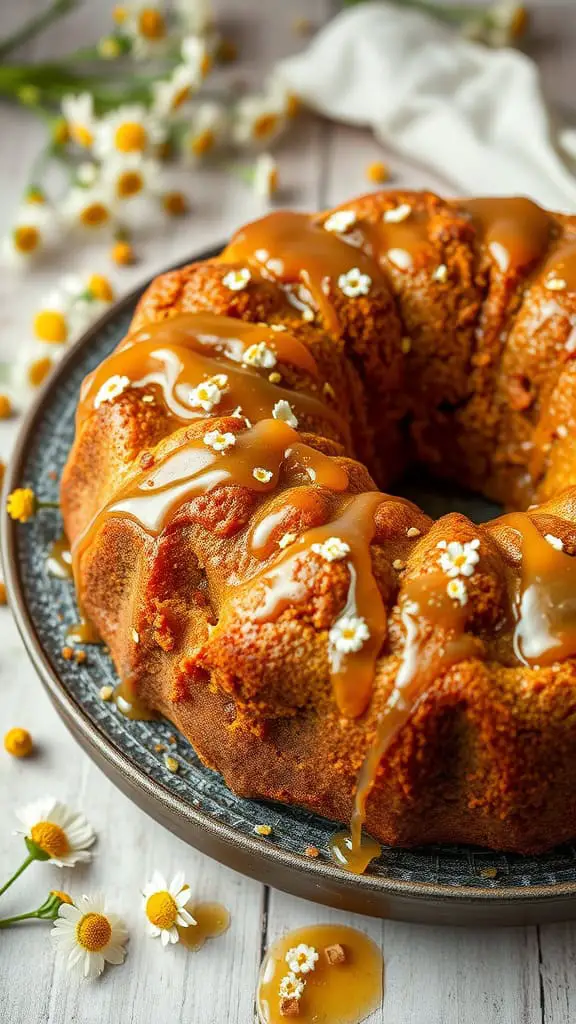
Chamomile honey cake is a delightful treat that brings the gentle flavors of chamomile tea and sweet honey together in a soft, moist cake. The floral notes from the chamomile create a comforting aroma, while the honey adds a touch of natural sweetness. This cake is not only easy to make but also a great option for any occasion, whether it’s a cozy afternoon gathering or a more formal dessert after dinner.
The cake’s gentle sweetness and subtle floral flavor make it a unique addition to your dessert table. Topped with a light glaze or served plain, it’s a lovely way to impress your guests with something a little different. Let’s dive into making this charming chamomile honey cake!
Ingredients
- 1 cup all-purpose flour
- 1/2 cup almond flour
- 1 teaspoon baking powder
- 1/2 teaspoon baking soda
- 1/4 teaspoon salt
- 1/2 cup unsalted butter, softened
- 1 cup granulated sugar
- 2 large eggs
- 1/4 cup honey
- 1 teaspoon vanilla extract
- 1 cup brewed chamomile tea (cooled)
- 1/4 cup milk
Instructions
- Preheat the oven to 350°F (175°C) and grease a bundt pan.
- In a bowl, whisk together the all-purpose flour, almond flour, baking powder, baking soda, and salt.
- In a separate large bowl, cream the softened butter and granulated sugar until light and fluffy. Add the eggs one at a time, mixing well after each addition.
- Stir in the honey and vanilla extract until combined.
- Gradually add the dry ingredients to the wet mixture, alternating with the cooled chamomile tea and milk. Mix until just combined.
- Pour the batter into the prepared bundt pan and smooth the top. Bake for 30-35 minutes, or until a toothpick inserted comes out clean.
- Allow the cake to cool in the pan for 10 minutes before transferring it to a wire rack to cool completely.
- Once cooled, drizzle with a honey glaze or serve plain. Enjoy!
Elderflower Lemon Tart
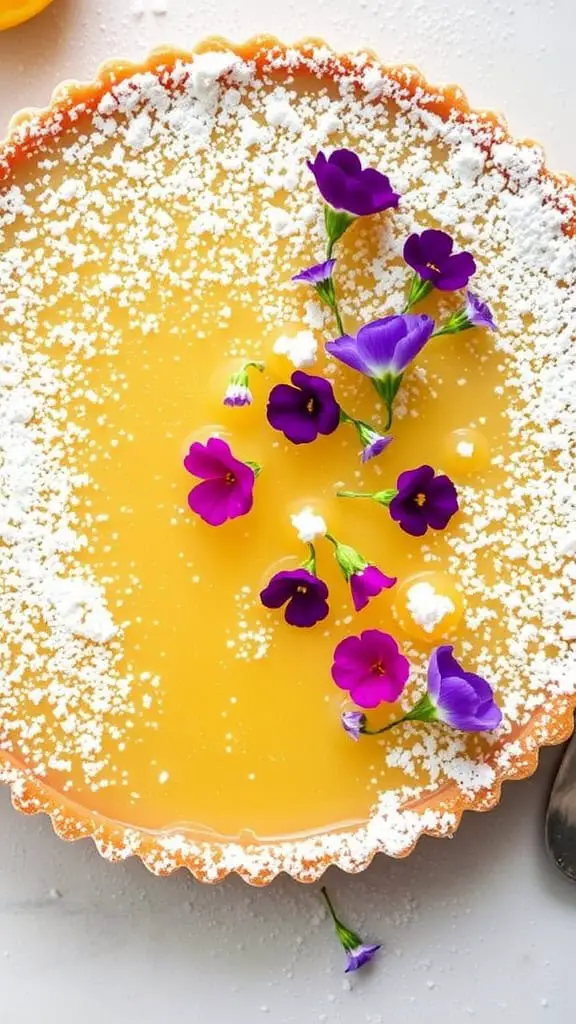
This Elderflower Lemon Tart is a delightful combination of zesty lemons and the subtle sweetness of elderflower. The bright, citrusy flavor cuts through the rich creaminess, making it a refreshing treat for any occasion. It’s surprisingly simple to make, perfect for both novice bakers and those looking to impress at a gathering.
The tart’s elegant presentation, topped with fresh flowers, can elevate any table setting. Whether served as a light dessert after dinner or as a sweet snack with afternoon tea, this dessert is sure to be a crowd-pleaser.
Ingredients
- 1 ½ cups all-purpose flour
- ½ cup powdered sugar
- ½ cup unsalted butter, softened
- 1 large egg yolk
- 2 tablespoons elderflower cordial
- 2 large eggs
- 1 cup granulated sugar
- 1/3 cup fresh lemon juice
- Zest of 1 lemon
- ¼ teaspoon salt
- Powdered sugar for dusting
- Edible flowers for garnish (optional)
Instructions
- Make the Crust: In a mixing bowl, combine flour and powdered sugar. Cut in the softened butter until crumbly. Stir in the egg yolk and elderflower cordial. Press the mixture into a tart pan and refrigerate for about 30 minutes.
- Pre-bake the Crust: Preheat the oven to 350°F (175°C). Blind-bake the crust for 15 minutes, then remove the weights and bake for an additional 5-10 minutes until lightly golden. Let it cool.
- Prepare the Filling: In another bowl, whisk together eggs, granulated sugar, lemon juice, lemon zest, and salt until smooth. Pour the mixture into the cooled crust.
- Bake the Tart: Bake for 20-25 minutes, or until the filling is set but still slightly wobbly in the center. Allow the tart to cool completely.
- Serve: Dust with powdered sugar and garnish with edible flowers before slicing and serving.
Peony Petal Pavlova
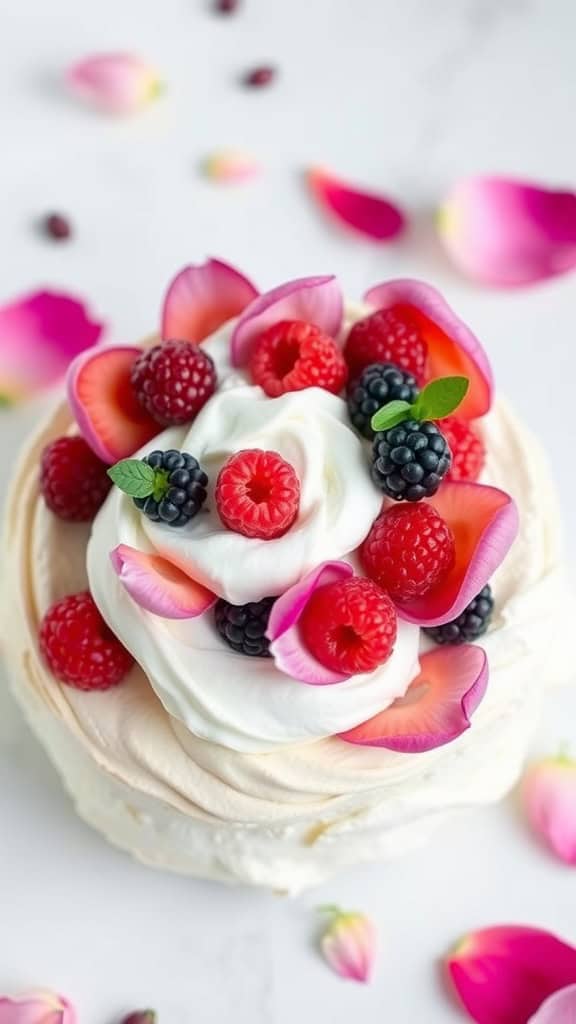
Pavlova is a delightful meringue-based dessert that’s light and airy, reminiscent of peony petals. With its crisp exterior and soft, marshmallow-like center, it brings a sweet balance to any occasion. Topped with whipped cream and fresh berries, it offers a refreshing burst of flavor that pairs beautifully with the delicate sweetness of the meringue.
Making pavlova is easier than you might think! This dessert is perfect for gatherings, bringing a touch of elegance without requiring extensive baking skills. Plus, the vibrant colors of the fruits and edible flowers make it visually stunning!
Ingredients
- 4 large egg whites
- 1 cup granulated sugar
- 1 teaspoon vanilla extract
- 1 teaspoon white vinegar
- 2 teaspoons cornstarch
- 1 cup heavy whipping cream
- 2 tablespoons powdered sugar
- 1 cup mixed berries (raspberries, blackberries, etc.)
- Fresh peony petals (edible, for garnish)
Instructions
- Preheat the Oven: Start by preheating your oven to 250°F (120°C). Line a baking sheet with parchment paper and draw a circle (about 8 inches in diameter) on it as a guide.
- Make the Meringue: In a clean, dry bowl, beat the egg whites on medium speed until soft peaks form. Gradually add sugar, a tablespoon at a time, until the mixture becomes glossy and stiff peaks form. Mix in the vanilla extract, vinegar, and cornstarch until well combined.
- Shape the Pavlova: Spoon the meringue onto the prepared baking sheet within the drawn circle. Create a slight indentation in the center for the toppings later.
- Bake: Place the pavlova in the oven and bake for about 1 hour and 15 minutes. Turn off the oven and let the pavlova cool completely inside the oven to prevent cracking.
- Prepare the Topping: Once cooled, whip the heavy cream with powdered sugar until soft peaks form. Spread it evenly over the pavlova.
- Top with Berries and Flowers: Arrange the mixed berries on top of the whipped cream and garnish with fresh peony petals.
Dandelion Jelly Donuts
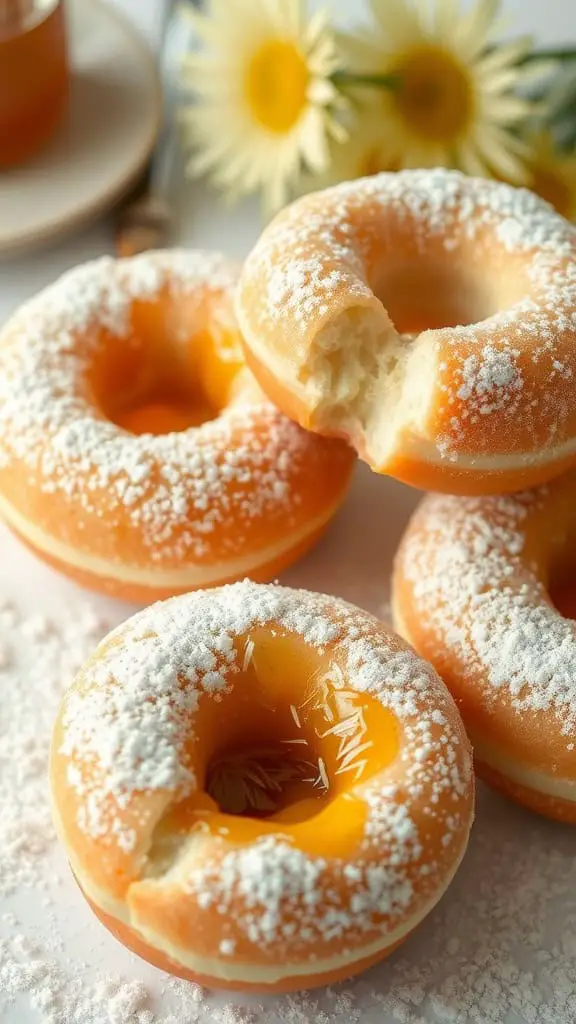
Dandelion jelly donuts are a delightful twist on a classic treat, featuring a light and fluffy donut filled with homemade dandelion jelly. These donuts have a unique floral flavor that is subtly sweet and reminiscent of spring. They are surprisingly simple to make, making them a fun project for both novice and experienced bakers.
The bright yellow filling adds a cheerful touch, and the dusting of powdered sugar gives them an elegant finish. Whether you’re celebrating a special occasion or just want to enjoy a tasty treat, these dandelion jelly donuts are sure to impress.
Ingredients
- 2 cups all-purpose flour
- 1/4 cup granulated sugar
- 2 teaspoons active dry yeast
- 1/2 teaspoon salt
- 1/2 cup milk, warmed
- 1/4 cup unsalted butter, melted
- 1 large egg
- 1 cup dandelion jelly
- Powdered sugar for dusting
Instructions
- Prepare the Dough: In a large bowl, combine the warm milk, sugar, and yeast. Let it sit for about 5 minutes until foamy. Add the melted butter, egg, and salt. Gradually stir in the flour until a soft dough forms.
- Knead the Dough: Turn the dough onto a floured surface and knead for about 5-7 minutes until smooth. Place it in a greased bowl, cover, and let it rise in a warm place until doubled in size, about 1 hour.
- Shape the Donuts: After the dough has risen, punch it down and roll it out to about 1/2 inch thick. Cut out donut shapes using a donut cutter or two round cutters. Place them on parchment paper and let them rise for another 30 minutes.
- Fry the Donuts: In a deep pan, heat oil to 350°F (175°C). Fry the donuts a few at a time until golden brown, about 2-3 minutes on each side. Remove and drain on paper towels.
- Fill the Donuts: Once cooled, use a piping bag to fill each donut with dandelion jelly. Dust with powdered sugar before serving.
Lavender Crème Brûlée
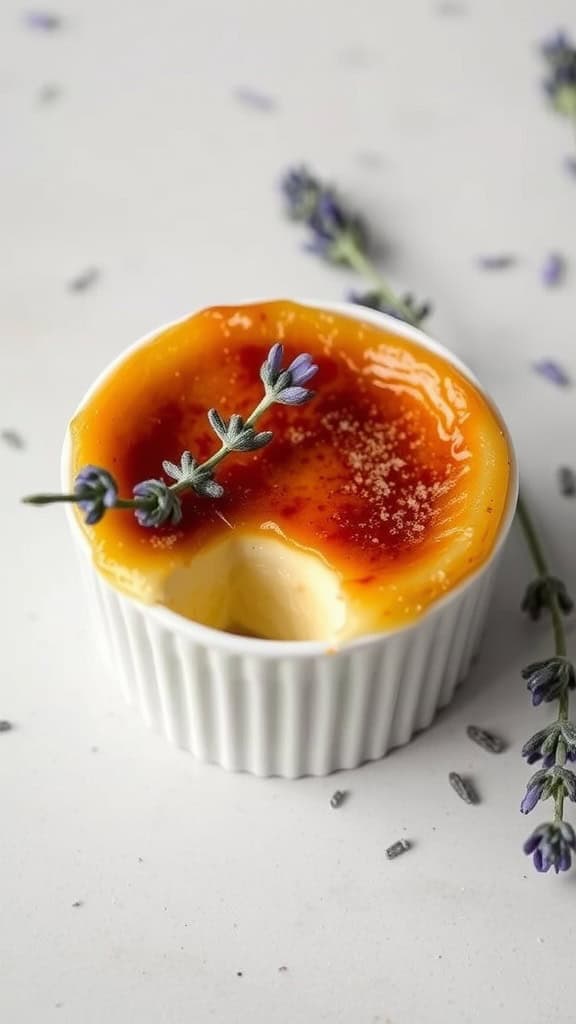
Lavender crème brûlée is a delightful dessert that combines the creamy richness of classic crème brûlée with the subtle floral notes of lavender. The smooth custard base, infused with lavender, offers a unique twist that elevates this traditional treat. Topped with a crisp caramelized sugar layer, each bite is a perfect balance of textures and flavors.
This recipe is relatively simple, making it accessible for both novice and experienced bakers. With just a few ingredients, you can create a dessert that feels special and elegant, perfect for any occasion.
Ingredients
- 2 cups heavy cream
- 1 tablespoon dried culinary lavender
- 4 large egg yolks
- 1/2 cup granulated sugar
- 1 teaspoon vanilla extract
- 1/4 cup granulated sugar (for caramelizing)
Instructions
- Infuse Cream: In a saucepan, heat the heavy cream and dried lavender over medium heat until it just begins to simmer. Remove from heat and let steep for 15 minutes.
- Prepare Custard: In a bowl, whisk together the egg yolks, 1/2 cup granulated sugar, and vanilla extract until well combined. Slowly strain the infused cream into the egg mixture, whisking constantly.
- Bake: Preheat your oven to 325°F (160°C). Divide the custard mixture evenly among ramekins. Place them in a baking dish and fill the dish with hot water until it reaches halfway up the sides of the ramekins. Bake for 30-35 minutes, or until set but still slightly jiggly in the center.
- Chill: Remove the ramekins from the water bath and cool to room temperature. Refrigerate for at least 2 hours, or overnight.
- Caramelize Sugar: Before serving, sprinkle a thin layer of granulated sugar over the top of each custard. Using a kitchen torch, carefully caramelize the sugar until it melts and forms a crisp layer. Let it sit for a minute before serving.
Rosewater Pistachio Cake
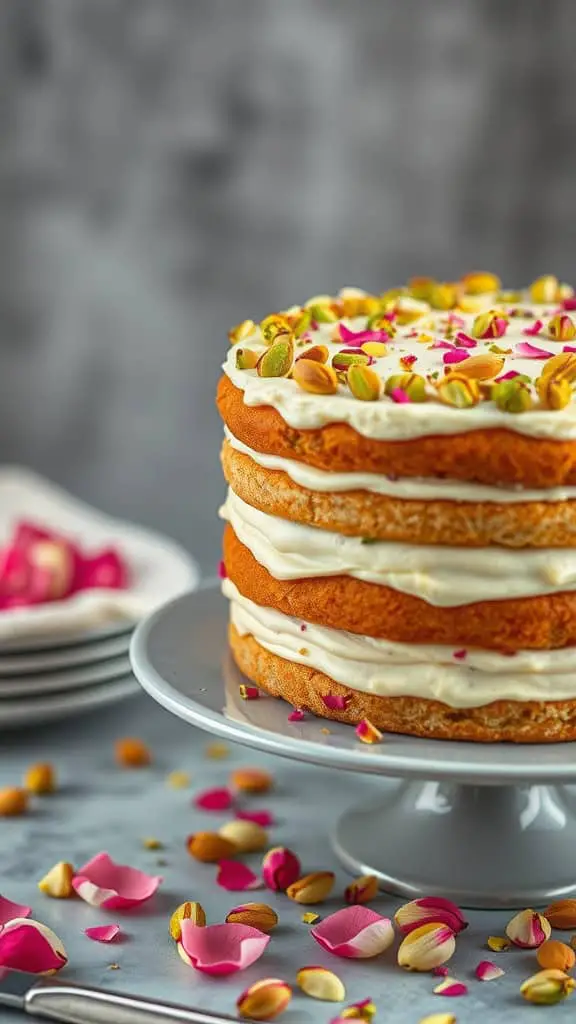
Rosewater Pistachio Cake is a delightful dessert that brings a touch of floral elegance to any occasion. With its light and airy texture, the cake is infused with aromatic rosewater and complemented by the rich, nutty flavor of pistachios. This cake is not only pleasing to the palate but also visually stunning, making it a perfect centerpiece for gatherings.
This recipe is relatively simple, making it accessible for both novice and experienced bakers. The combination of flavors creates a unique taste experience that is sure to impress your family and friends.
Ingredients
- 1 ½ cups all-purpose flour
- 1 teaspoon baking powder
- ½ teaspoon baking soda
- ¼ teaspoon salt
- ½ cup unsalted butter, softened
- 1 cup granulated sugar
- 2 large eggs
- 1 tablespoon rosewater
- ½ cup whole milk
- ½ cup finely chopped pistachios
- 1 cup cream cheese, softened
- 2 cups powdered sugar
- 1 tablespoon rosewater (for frosting)
- Pistachios and rose petals for garnish
Instructions
- Preheat your oven to 350°F (175°C). Grease and flour two 8-inch round cake pans.
- In a bowl, whisk together the flour, baking powder, baking soda, and salt. Set aside.
- In another bowl, beat the softened butter and granulated sugar until light and fluffy. Add the eggs one at a time, mixing well after each addition. Stir in the rosewater.
- Gradually add the dry ingredients to the wet mixture, alternating with the milk until just combined. Fold in the chopped pistachios.
- Divide the batter evenly between the prepared pans and smooth the tops. Bake for 25-30 minutes, or until a toothpick comes out clean. Let the cakes cool in the pans for 10 minutes, then transfer to wire racks to cool completely.
- To make the frosting, beat the cream cheese and powdered sugar together until smooth. Add the rosewater and mix until well combined.
- Once the cakes are completely cool, spread a layer of frosting between the two layers and then frost the top and sides. Garnish with additional pistachios and rose petals before serving.
Orchid Coconut Pudding
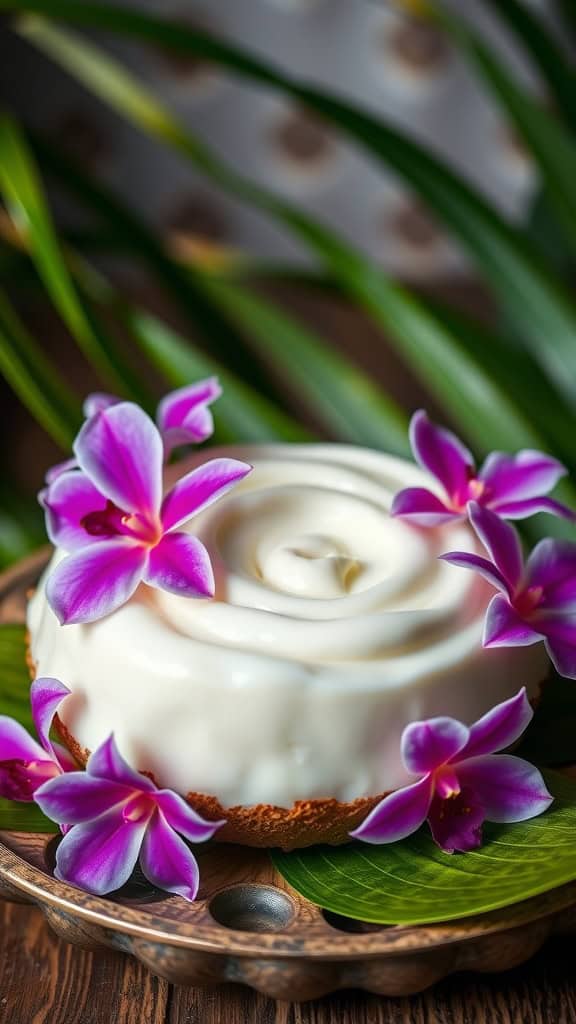
Orchid Coconut Pudding is a delightful dessert that brings the flavors of coconut and a hint of floral elegance to your table. This creamy pudding is light yet satisfying, making it a perfect treat for warm days or special occasions. With its smooth texture and subtle sweetness, it’s simple to make and even simpler to enjoy!
The addition of coconut not only enhances the flavor but also contributes a tropical feel that pairs beautifully with the delicate floral notes. Whether you’re hosting a gathering or just indulging in a sweet moment, this dessert is sure to impress.
Ingredients
- 1 cup coconut milk
- 1 cup heavy cream
- 1/3 cup granulated sugar
- 2 teaspoons gelatin powder
- 2 tablespoons cold water
- 1 teaspoon vanilla extract
- 1/4 teaspoon almond extract
- Edible orchids for garnish (optional)
Instructions
- Prep the Gelatin: In a small bowl, sprinkle gelatin over cold water and let it bloom for about 5 minutes.
- Heat the Mixture: In a saucepan, combine coconut milk, heavy cream, and sugar. Heat over medium heat, stirring until the sugar dissolves and the mixture is warm but not boiling.
- Combine Gelatin: Remove the saucepan from heat and stir in the bloomed gelatin until fully dissolved. Add the vanilla and almond extracts.
- Chill: Pour the mixture into individual serving cups or a large mold. Refrigerate for at least 4 hours or until set.
- Serve: Once set, garnish with edible orchids and enjoy your elegant dessert!
Cherry Blossom Mousse
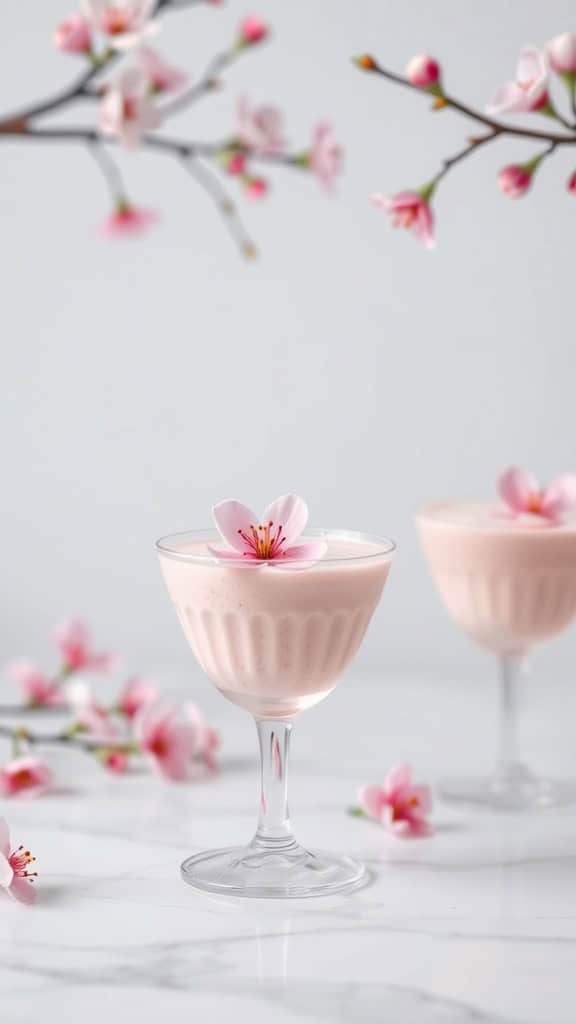
Cherry Blossom Mousse is a delightful dessert that brings a taste of spring to your table. Light and airy, this mousse features a subtle cherry flavor balanced with a creamy texture, making each bite a refreshing treat. It’s surprisingly easy to whip up, requiring just a few ingredients and minimal effort, perfect for both novice bakers and seasoned chefs.
This mousse not only pleases the palate but also adds a touch of elegance to any gathering. The delicate pink hue is reminiscent of cherry blossoms in full bloom, making it a beautiful addition to your dessert spread. Serve it in elegant glasses, topped with fresh cherries or edible flowers for an extra special presentation!
Ingredients
- 1 cup heavy cream
- 1/2 cup cherry puree (fresh or canned)
- 1/4 cup granulated sugar
- 1 teaspoon vanilla extract
- 1 tablespoon gelatin powder
- 2 tablespoons cold water
- Edible flowers or fresh cherries for garnish
Instructions
- Prepare the Gelatin: In a small bowl, sprinkle the gelatin over cold water. Let it sit for about 5 minutes to bloom.
- Heat the Cherry Puree: In a small saucepan, gently heat the cherry puree and sugar over low heat until warm. Stir in the bloomed gelatin until fully dissolved, then remove from heat.
- Whip the Cream: In a separate bowl, whip the heavy cream and vanilla extract until soft peaks form.
- Combine Mixtures: Gently fold the cherry mixture into the whipped cream until well combined. Be careful not to deflate the cream.
- Chill: Spoon the mousse into serving glasses and refrigerate for at least 2 hours to set.
- Serve: Once set, garnish with edible flowers or fresh cherries before serving.
Lilac Honey Ice Cream
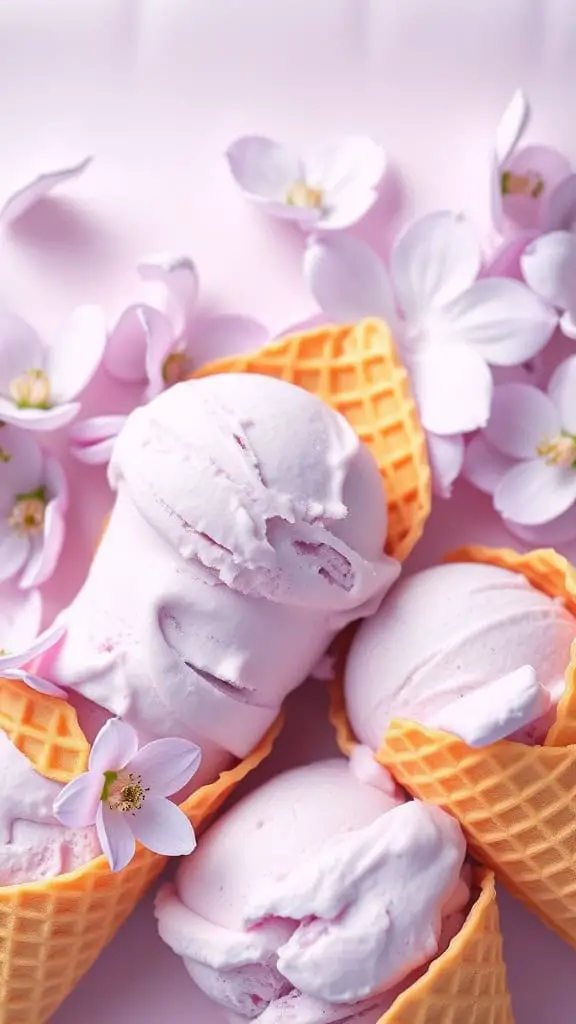
If you’re looking for a sweet treat that adds a touch of elegance to your dessert table, lilac honey ice cream is a delightful choice. The floral notes of lilac paired with the rich creaminess of ice cream create a unique flavor experience that’s both refreshing and indulgent. Plus, it’s quite simple to make, making it a fun project for any aspiring home chef.
This ice cream is perfect for warm days or special occasions. The subtle sweetness of honey enhances the delicate floral flavors, making every scoop feel like a little taste of spring. Serve it in a crisp cone or alongside other floral-inspired desserts for a charming presentation.
Ingredients
- 2 cups heavy cream
- 1 cup whole milk
- 3/4 cup sugar
- 1/2 cup lilac syrup (see instructions below)
- 1 teaspoon vanilla extract
- 1 tablespoon honey
- 1/4 teaspoon salt
Instructions
- Combine ingredients: In a mixing bowl, whisk together the heavy cream, whole milk, sugar, lilac syrup, vanilla extract, honey, and salt until the sugar is dissolved.
- Chill the mixture: Cover the bowl and refrigerate for at least 2 hours, or overnight for best results.
- Churn the ice cream: Pour the chilled mixture into an ice cream maker and churn according to the manufacturer’s instructions until it reaches a soft-serve consistency.
- Freeze: Transfer the ice cream to an airtight container and freeze for at least 4 hours, or until fully set.
- Serve: Scoop the lilac honey ice cream into cones or bowls, and enjoy your floral-inspired dessert!
Hibiscus Raspberry Sorbet
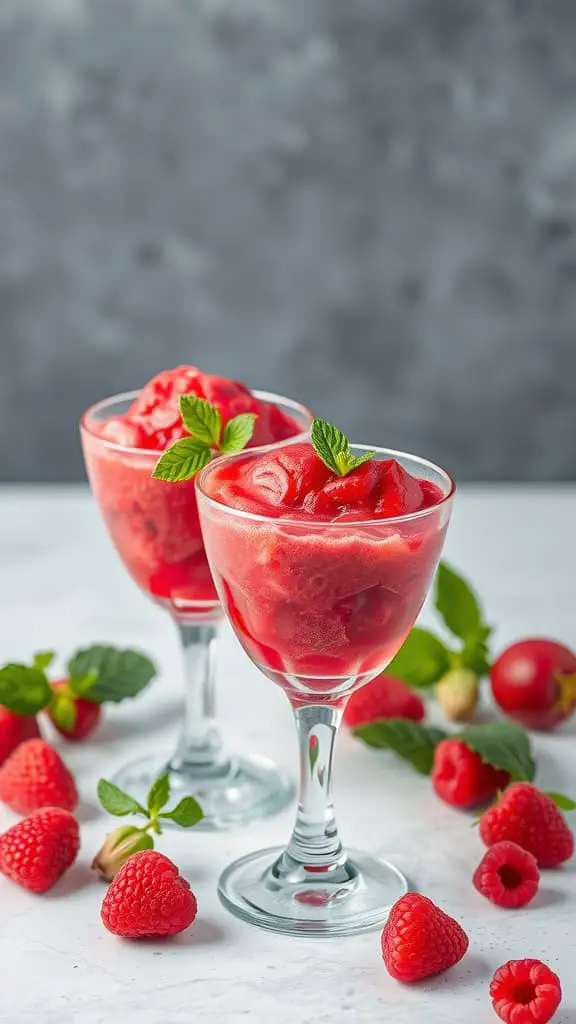
This delightful Hibiscus Raspberry Sorbet combines floral and fruity flavors for a refreshing treat. The tartness of fresh raspberries beautifully complements the floral notes from hibiscus, creating a dessert that is both vibrant and satisfying. It’s simple to make, requiring just a few ingredients and minimal effort, making it a perfect choice for warm days or special gatherings.
Indulge your taste buds with this elegant sorbet that brings a touch of sophistication to any occasion. Whether served as a palate cleanser or a light dessert, it’s sure to impress your guests and leave them craving more.
Ingredients
- 2 cups fresh raspberries
- 1 cup water
- 1/2 cup sugar
- 1 cup dried hibiscus flowers
- 1 tablespoon lemon juice
Instructions
- Make the Hibiscus Tea: In a saucepan, bring water to a boil. Add dried hibiscus flowers and sugar, then reduce heat and simmer for about 10 minutes. Strain the mixture to remove the flowers and let it cool.
- Prepare the Raspberry Puree: In a blender, combine fresh raspberries and lemon juice. Blend until smooth, then strain to remove seeds if desired.
- Combine and Freeze: Mix the cooled hibiscus tea with the raspberry puree. Pour the mixture into a shallow dish and place it in the freezer.
- Scrape and Serve: After about 2 hours, use a fork to scrape the mixture, breaking up any ice crystals. Continue freezing for another 2 hours, then scrape again before serving.
Elderflower Madeleines
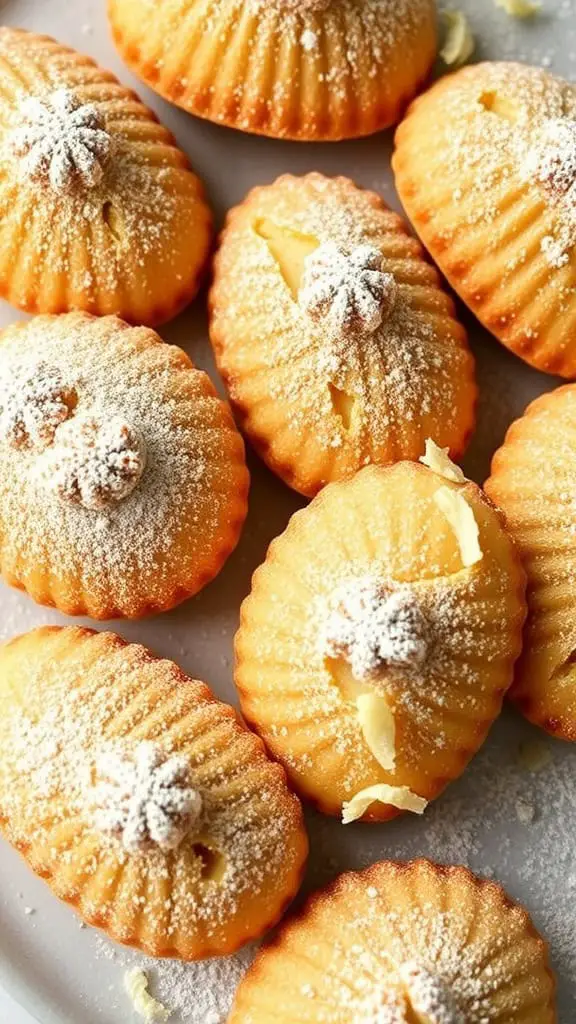
Elderflower madeleines are delicate, charming treats that bring a floral twist to the classic French pastry. With their soft, buttery texture and subtle elderflower flavor, these madeleines are perfect for afternoon tea or a light dessert. They are quite simple to prepare, making them an excellent choice for both novice bakers and seasoned pros.
The gentle sweetness of elderflower complements the richness of the butter, creating a delightful balance that’s sure to please. Each bite is a little taste of elegance, making them a lovely addition to any gathering or celebration.
Ingredients
- 1/2 cup unsalted butter, melted
- 1/2 cup granulated sugar
- 2 large eggs
- 1 teaspoon vanilla extract
- 1/4 cup elderflower cordial
- 1 cup all-purpose flour
- 1 teaspoon baking powder
- Pinch of salt
Instructions
- Preheat your oven to 375°F (190°C) and grease a madeleine pan.
- In a bowl, whisk together the melted butter and sugar until well combined. Add the eggs one at a time, mixing well after each addition.
- Stir in the vanilla extract and elderflower cordial.
- In a separate bowl, whisk together the flour, baking powder, and salt. Gradually fold the dry ingredients into the wet mixture until just combined.
- Spoon the batter into the prepared madeleine mold, filling each cavity about 3/4 full.
- Bake for 10-12 minutes or until the edges are golden brown and the centers spring back when touched.
- Remove from the oven and let cool for a few minutes before transferring to a wire rack.
- Dust with powdered sugar before serving.
Marigold-Infused Rice Pudding
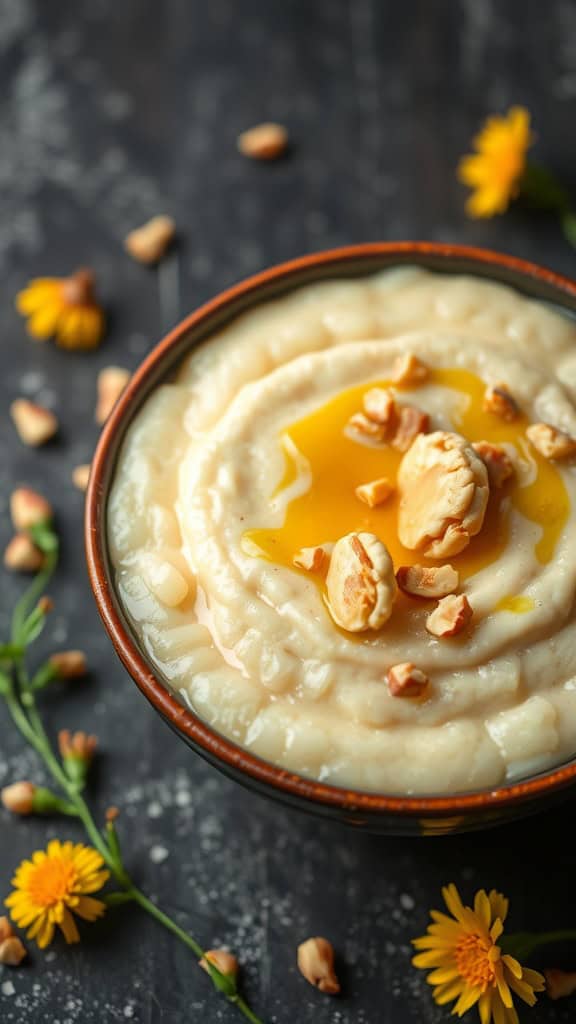
Marigold-infused rice pudding is a delightful twist on a classic dessert. This creamy treat combines the comforting flavors of rice and milk with the floral notes of marigold petals, creating a unique and fragrant experience. It’s smooth, subtly sweet, and offers a lovely hint of floral aroma, making it a delightful end to any meal.
The recipe is simple and perfect for both novice and experienced cooks. With just a few ingredients, you can whip up this elegant dessert that’s sure to impress. Whether served warm or chilled, marigold-infused rice pudding is a charming way to add a touch of nature to your table.
Ingredients
- 1 cup Arborio rice
- 4 cups whole milk
- 1/3 cup granulated sugar
- 1 teaspoon vanilla extract
- 1/2 cup marigold petals (fresh or dried)
- 1/4 teaspoon salt
- Chopped nuts for garnish (optional)
Instructions
- Rinse the Arborio rice under cold water until the water runs clear. This helps remove excess starch.
- In a medium saucepan, combine the rinsed rice, milk, sugar, salt, and marigold petals. Bring to a gentle boil over medium heat, stirring occasionally.
- Reduce the heat to low and simmer the mixture for about 20-25 minutes, or until the rice is tender and the pudding has thickened, stirring frequently to prevent sticking.
- Remove from heat and stir in the vanilla extract. Let the pudding cool slightly before serving.
- Serve warm or chilled, garnished with chopped nuts if desired. Enjoy your flavorful, floral creation!
Daisy Vanilla Bean Cupcakes
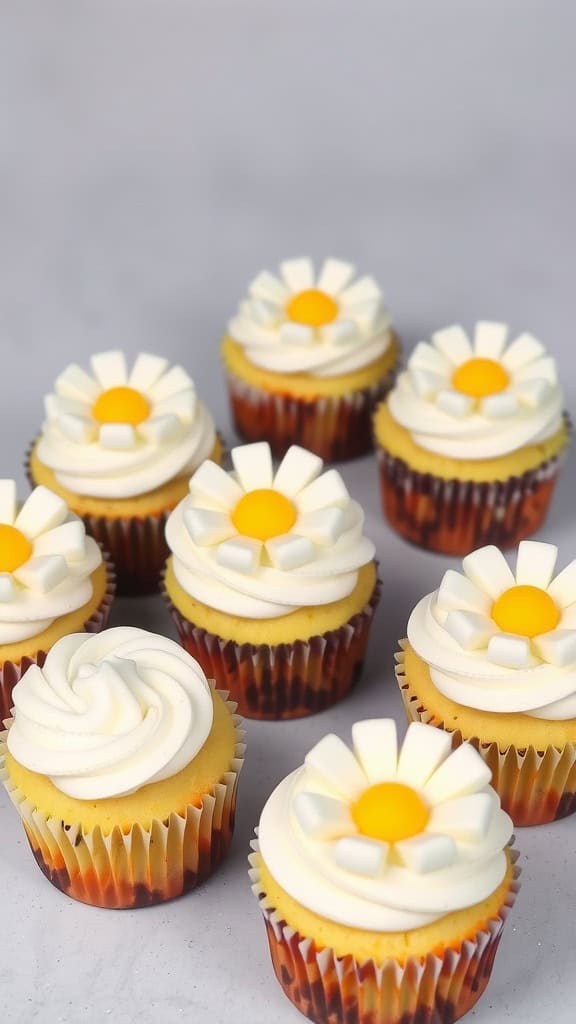
These Daisy Vanilla Bean Cupcakes are a delightful treat that combines a light and fluffy vanilla flavor with an elegant floral touch. The sweetness of the vanilla pairs beautifully with the creamy frosting, creating a satisfying dessert that’s both pretty and delicious. Not only are they scrumptious, but they’re also simple to whip up, making them perfect for any occasion!
With their charming daisy design, these cupcakes are ideal for spring gatherings, birthday parties, or just a cozy afternoon at home. They’re sure to impress your guests while bringing a touch of nature to the table. Let’s dive into the recipe and start baking!
Ingredients
- 1 ½ cups all-purpose flour
- 1 cup granulated sugar
- ½ cup unsalted butter, softened
- 2 large eggs
- 1 teaspoon vanilla extract
- 1 teaspoon vanilla bean paste
- 2 teaspoons baking powder
- ½ teaspoon salt
- ½ cup milk
- 1 cup heavy cream
- 2 tablespoons powdered sugar
- Yellow candy melts (for decoration)
- White fondant (for petals)
Instructions
- Preheat the oven to 350°F (175°C). Line a muffin tin with cupcake liners.
- In a large bowl, cream together the softened butter and granulated sugar until light and fluffy. Add in the eggs, one at a time, mixing well after each addition.
- Stir in the vanilla extract and vanilla bean paste.
- In another bowl, mix the flour, baking powder, and salt. Gradually add this dry mixture to the wet ingredients, alternating with the milk.
- Fill each cupcake liner about two-thirds full with the batter. Bake for 18-20 minutes or until a toothpick inserted into the center comes out clean.
- While the cupcakes are cooling, whip the heavy cream with powdered sugar until soft peaks form. This will be your frosting.
- Once the cupcakes have cooled completely, frost each one generously with whipped cream.
- To create the daisy design, cut the fondant into petal shapes and place them around a yellow candy melt in the center of each cupcake.
- Serve and enjoy your delightful Daisy Vanilla Bean Cupcakes!
Rose-Infused Chocolate Truffles
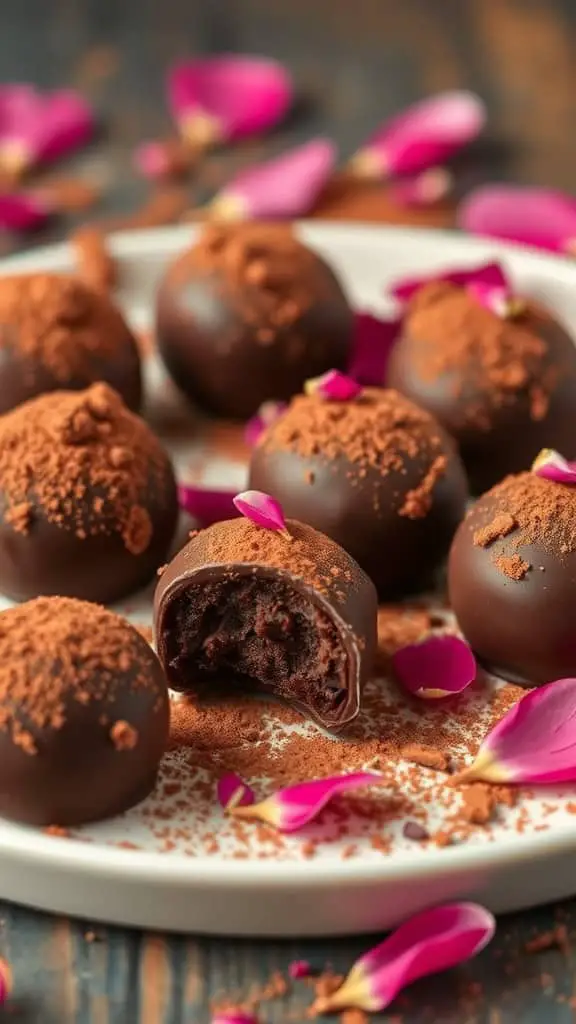
Rose-infused chocolate truffles are a delightful treat that beautifully balance rich chocolate with the delicate essence of rose. These little bites are not only a feast for the taste buds but also an elegant addition to any dessert table. With their creamy texture and floral notes, they make for a lovely indulgence that’s surprisingly simple to prepare.
Making these truffles is a straightforward process that requires minimal ingredients. The combination of chocolate and cream creates a luscious ganache, while the rose essence adds a unique twist that elevates the flavor. Whether you’re celebrating a special occasion or just treating yourself, these truffles are sure to impress.
Ingredients
- 8 oz dark chocolate, chopped
- 1/2 cup heavy cream
- 1 tsp rose water
- 1/4 cup unsweetened cocoa powder
- Edible rose petals for garnish
Instructions
- Make the Ganache: Place the chopped dark chocolate in a heatproof bowl. In a small saucepan, heat the heavy cream over medium heat until it begins to simmer. Pour the hot cream over the chocolate and let it sit for a minute. Stir until smooth.
- Add Rose Water: Once the ganache is smooth, stir in the rose water. Allow the mixture to cool to room temperature, then refrigerate for about 1-2 hours until firm.
- Shape the Truffles: Once the ganache is firm, use a melon baller or your hands to scoop out small portions and roll them into balls.
- Coat the Truffles: Roll each truffle in cocoa powder to coat. For an added touch, garnish with edible rose petals.
- Chill: Place the finished truffles on a plate and refrigerate until ready to serve. Enjoy your elegant rose-infused chocolate truffles!
Sunflower Honey Granola Bars
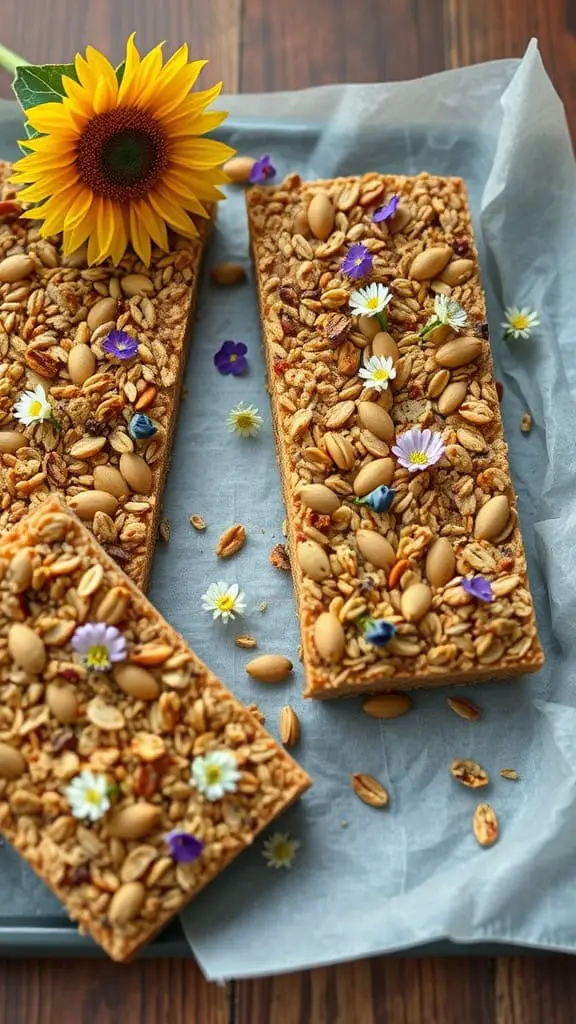
Sunflower Honey Granola Bars are a delightful treat that balances sweetness with a satisfying crunch. Made primarily with oats and sunflower seeds, they’re both nutritious and tasty, perfect for a quick snack or an energy boost during your day. The addition of honey brings a natural sweetness, while various nuts and dried fruits enhance the flavor and texture.
This recipe is straightforward and requires minimal preparation, making it a fun and easy project to tackle any time. Whether you enjoy them on the go or as a midday snack, these granola bars are sure to please!
Ingredients
- 2 cups rolled oats
- 1 cup sunflower seeds
- 1/2 cup honey
- 1/2 cup almond butter
- 1/4 cup chopped dried fruit (such as cranberries or apricots)
- 1/4 cup chopped nuts (like almonds or walnuts)
- 1/2 teaspoon vanilla extract
- 1/2 teaspoon salt
Instructions
- Preheat the Oven: Preheat your oven to 350°F (175°C) and line a baking dish with parchment paper.
- Mix Ingredients: In a large bowl, combine the rolled oats, sunflower seeds, dried fruit, and nuts. In a small saucepan over low heat, mix together the honey, almond butter, vanilla extract, and salt until smooth.
- Combine: Pour the warm honey mixture over the dry ingredients and stir until everything is evenly coated.
- Press into Pan: Transfer the mixture into the prepared baking dish, pressing it down firmly to ensure the bars hold together.
- Bake: Bake in the preheated oven for 20-25 minutes or until lightly golden. Allow to cool completely before cutting into bars.
Pansy Lemon Sugar Cookies
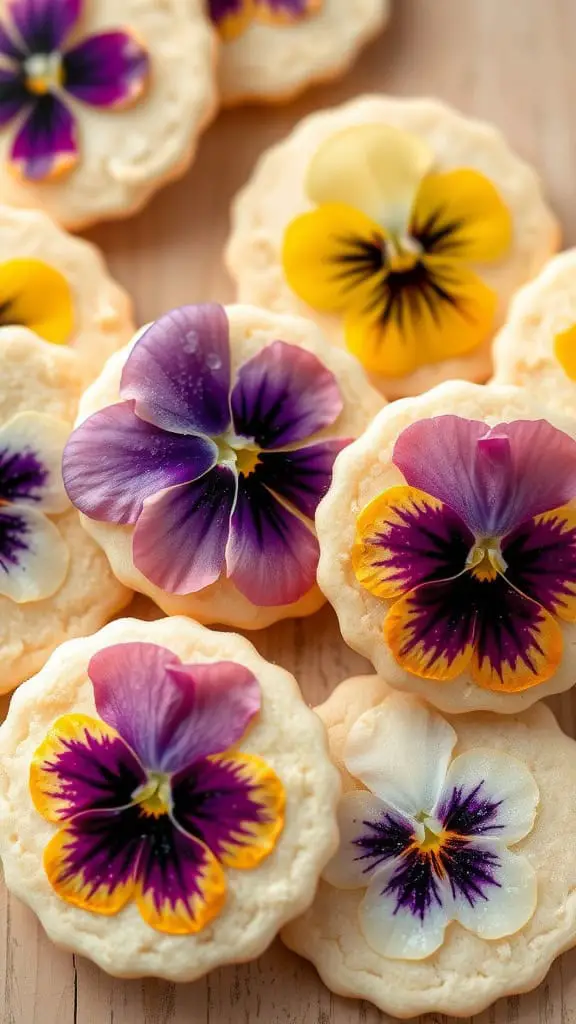
Pansy lemon sugar cookies are a delightful treat that combines the zesty brightness of lemon with the delicate beauty of edible pansies. These cookies are soft, buttery, and bursting with a light citrus flavor, making them a refreshing snack or dessert. Plus, they’re simple enough for bakers of all levels to enjoy making.
The addition of colorful pansies not only elevates the cookies visually but also adds a touch of floral elegance to every bite. Perfect for spring gatherings or special occasions, these cookies are sure to impress your guests and add a splash of color to your dessert table.
Ingredients
- 2 cups all-purpose flour
- 1/2 teaspoon baking powder
- 1/4 teaspoon salt
- 1/2 cup unsalted butter, softened
- 1 cup granulated sugar
- 1 large egg
- 1 tablespoon lemon zest
- 2 tablespoons fresh lemon juice
- 1 teaspoon vanilla extract
- Edible pansies for decoration
Instructions
- Preheat the Oven: Begin by preheating your oven to 350°F (175°C) and lining a baking sheet with parchment paper.
- Mix the Dry Ingredients: In a bowl, whisk together the flour, baking powder, and salt. Set aside.
- Cream the Butter and Sugar: In a separate bowl, cream the softened butter and granulated sugar until light and fluffy. This should take about 3-5 minutes.
- Add the Egg and Flavorings: Beat in the egg, lemon zest, lemon juice, and vanilla extract until well combined.
- Combine: Gradually add the dry ingredients to the wet mixture, mixing until just combined.
- Shape the Cookies: Scoop tablespoons of dough onto the prepared baking sheet, spacing them about 2 inches apart. Flatten each dough ball slightly.
- Bake: Bake for 10-12 minutes, or until the edges are lightly golden. Allow the cookies to cool for a few minutes on the baking sheet before transferring them to a wire rack.
- Decorate: Once cooled, gently press edible pansies onto the top of each cookie for a floral touch.
Butterfly Pea Flower Cheesecake Bars
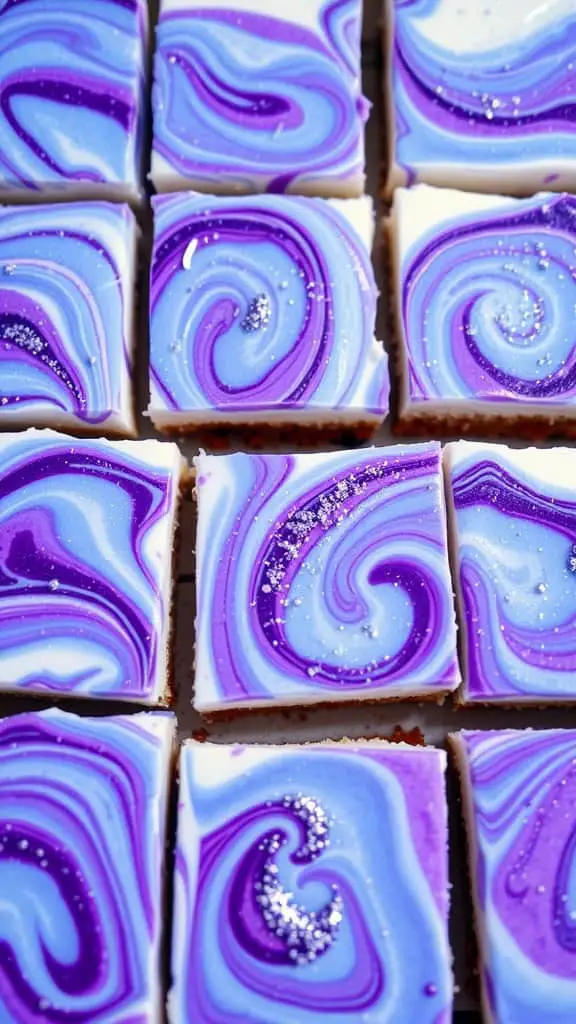
Butterfly pea flower cheesecake bars are a delightful blend of creamy texture and floral essence. With a visually striking blue and purple marbled topping, these bars not only taste refreshing but also add a touch of elegance to any dessert table. The floral notes from the butterfly pea flowers bring a unique twist that makes these bars stand out and taste deliciously different.
Making these cheesecake bars is quite simple, even for beginners. The process involves preparing a buttery crust, a smooth cheesecake filling, and a stunning marbled topping that’s sure to impress. Perfect for gatherings or just a special treat at home, this recipe is both fun and satisfying to create.
Ingredients
- 1 ½ cups graham cracker crumbs
- ½ cup unsalted butter, melted
- 2 cups cream cheese, softened
- 1 cup granulated sugar
- 2 large eggs
- 1 teaspoon vanilla extract
- ½ cup sour cream
- 2 tablespoons butterfly pea flower powder
- 1 tablespoon water
Instructions
- Prepare the Crust: Preheat the oven to 325°F (160°C). In a bowl, combine graham cracker crumbs and melted butter. Press the mixture firmly into the bottom of a greased 9×9-inch baking pan. Bake for 10 minutes and set aside to cool.
- Make the Cheesecake Filling: In a mixing bowl, beat cream cheese and sugar until smooth. Add eggs one at a time, mixing well after each addition. Stir in vanilla extract and sour cream until fully combined.
- Create the Floral Topping: In a small bowl, mix butterfly pea flower powder with water to create a vibrant paste. Gradually swirl this paste into the cheesecake filling for a marbled effect.
- Bake: Pour the cheesecake mixture over the cooled crust and smooth the top. Bake for 35-40 minutes or until the edges are set and the center is slightly jiggly. Allow to cool at room temperature before refrigerating for at least 4 hours.
- Serve: Once chilled, cut into squares and enjoy your butterfly pea flower cheesecake bars!
Calendula Almond Biscotti
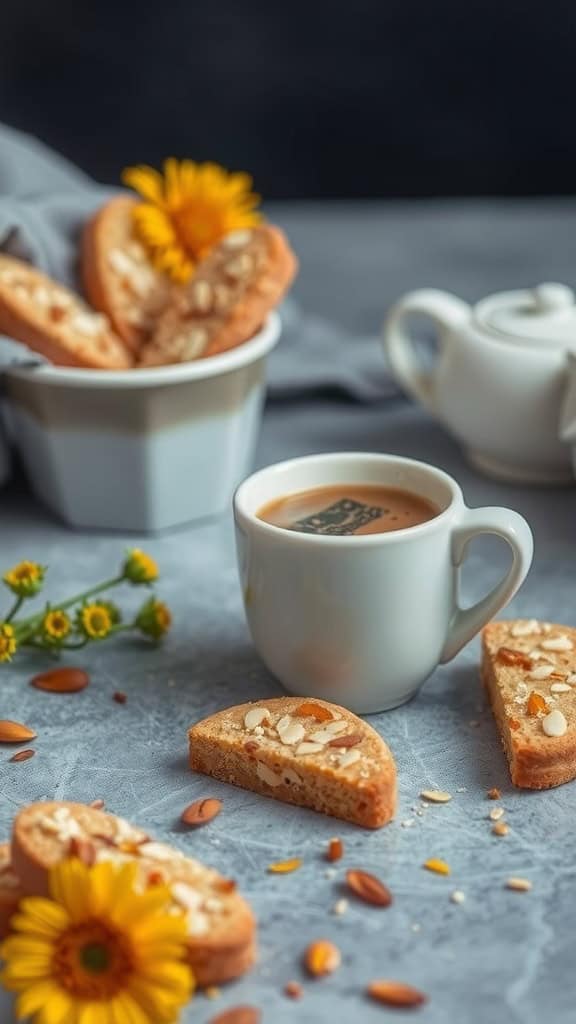
Calendula Almond Biscotti are a delightful treat that perfectly blend the nutty flavor of almonds with the subtle floral notes of calendula petals. This recipe isn’t just easy to make; it also brings a touch of elegance to your dessert table. The crunchy texture makes them ideal for dipping into your favorite beverage, making every bite a delightful experience.
These biscotti are slightly sweet, with a hint of floral aroma that complements the almonds beautifully. Whether enjoyed with coffee or tea, they add a charming touch to any occasion, making them a lovely addition to your collection of flower-inspired desserts.
Ingredients
- 1 cup all-purpose flour
- 1/2 cup almond flour
- 1/2 cup granulated sugar
- 1/2 teaspoon baking powder
- 1/4 teaspoon salt
- 1/2 cup sliced almonds
- 2 tablespoons dried calendula petals
- 2 large eggs
- 1 teaspoon vanilla extract
Instructions
- Preheat the oven to 350°F (175°C) and line a baking sheet with parchment paper.
- In a bowl, combine all-purpose flour, almond flour, sugar, baking powder, and salt. Mix well.
- Add the sliced almonds and calendula petals to the dry mixture, stirring until fully incorporated.
- In a separate bowl, whisk together the eggs and vanilla extract. Pour the wet ingredients into the dry mixture, stirring until a dough forms.
- Shape the dough into a log about 12 inches long and place it on the prepared baking sheet. Flatten slightly.
- Bake for 25-30 minutes, until the log is golden brown. Remove from the oven and let it cool for about 10 minutes.
- Once cooled, slice the log diagonally into 1/2-inch pieces. Place the slices back on the baking sheet, cut side down.
- Bake again for another 10-15 minutes, or until the biscotti are crisp and golden.
- Allow to cool completely before serving. Enjoy with your favorite beverage!
Lavender Earl Grey Chiffon Cake
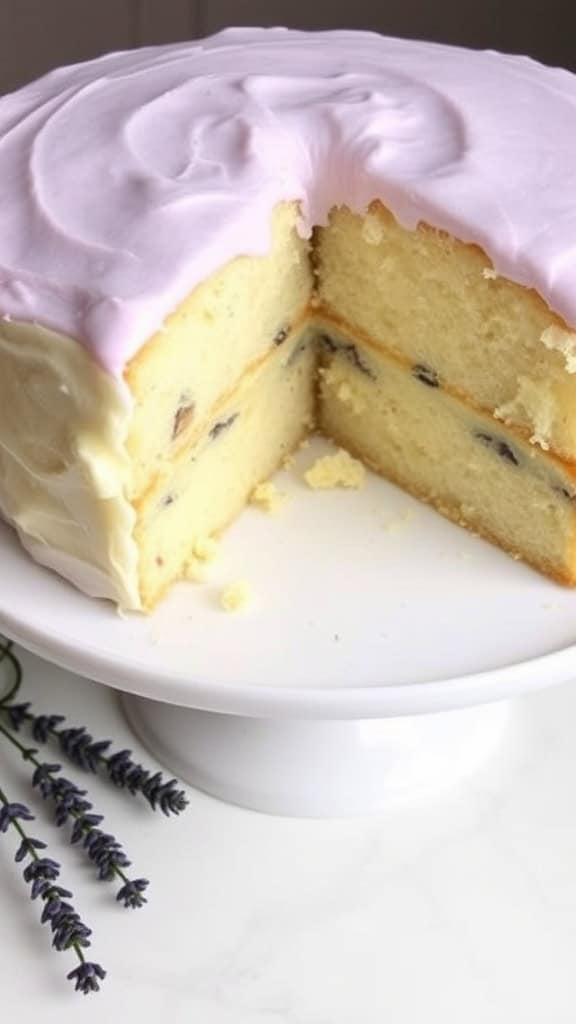
Lavender Earl Grey Chiffon Cake is a delightful treat that combines the lightness of chiffon with the aromatic flavors of Earl Grey and lavender. This cake is not only tender and fluffy but also infused with a subtle floral taste, making it perfect for spring gatherings or afternoon tea parties. It’s surprisingly simple to make, even for novice bakers, and will impress anyone who tries it.
The gentle hints of bergamot in the Earl Grey tea, paired with the soothing lavender, create a unique flavor profile that’s both calming and refreshing. Whether you serve it plain or adorn it with a light frosting, this cake is sure to add a touch of elegance to your dessert table.
Ingredients
- 1 cup all-purpose flour
- 1/2 cup granulated sugar
- 1/2 teaspoon baking powder
- 1/4 teaspoon salt
- 1/2 cup vegetable oil
- 2 large eggs, separated
- 1/2 cup brewed Earl Grey tea, cooled
- 1 tablespoon dried culinary lavender
- 1/2 teaspoon vanilla extract
- 1/4 teaspoon cream of tartar
Instructions
- Preheat the oven to 325°F (160°C). Grease a 9-inch round cake pan and line the bottom with parchment paper.
- In a large bowl, whisk together flour, sugar, baking powder, and salt. In another bowl, mix oil, egg yolks, cooled tea, lavender, and vanilla until well combined.
- Add the wet ingredients to the dry ingredients and mix until just combined.
- In a separate bowl, beat egg whites with cream of tartar until stiff peaks form. Gently fold the egg whites into the batter in three additions, being careful not to deflate the mixture.
- Pour the batter into the prepared pan and smooth the top. Bake for 25-30 minutes, or until a toothpick inserted into the center comes out clean.
- Allow the cake to cool in the pan for 10 minutes, then invert onto a wire rack to cool completely before serving.

Lila Ashford is the creator of Tofu Moo Recipes, where she shares her love for indulgent desserts, refreshing drinks, and irresistible snacks. With a passion for simple pleasures and a flair for cozy elegance, Lila hopes to inspire moments of joy in every bite. Follow her for more delightful creations!

