
Spring is here, and with it comes the urge to enjoy delightful treats without spending hours in the kitchen. No-bake desserts are the way to go, making it easy to create delicious delights like cheesecake jars and cookie dough bites in a snap. Whether you’re hosting a gathering or just treating yourself, these simple recipes will satisfy your sweet tooth while letting you soak up the sunshine.
Chocolate Chip Cookie Dough Bites
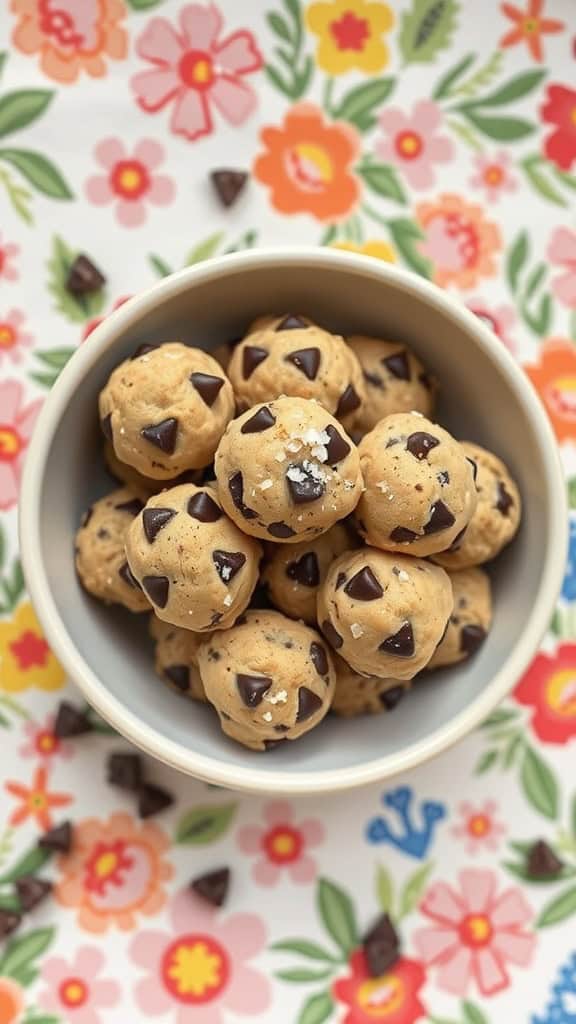
Chocolate chip cookie dough bites are a delightful treat that brings the rich, sweet flavor of cookie dough into bite-sized pieces. These easy-to-make snacks are perfect for those busy spring days when you want something sweet without the hassle of baking.
Soft, chewy, and loaded with chocolate chips, these bites are a crowd-pleaser for all ages. Plus, you can whip them up in no time, making them an excellent choice for a quick dessert or a fun snack to share with friends and family!
Ingredients
- 1 cup all-purpose flour
- 1/2 cup unsalted butter, softened
- 1/3 cup granulated sugar
- 1/3 cup brown sugar, packed
- 1 teaspoon vanilla extract
- 1/2 teaspoon salt
- 1 cup chocolate chips
Instructions
- Prep the Dough: In a mixing bowl, combine softened butter, granulated sugar, brown sugar, vanilla extract, and salt. Mix until well blended.
- Add Flour: Gradually add in the all-purpose flour, mixing until combined. Be sure not to overmix.
- Stir in Chocolate: Fold in chocolate chips, ensuring they are evenly distributed throughout the dough.
- Form Bites: Scoop out small portions of the dough and roll them into balls. Place them on a baking sheet lined with parchment paper.
- Chill: Refrigerate the cookie dough bites for about 30 minutes to firm them up before serving.
Mini Key Lime Pies in Graham Cracker Crusts
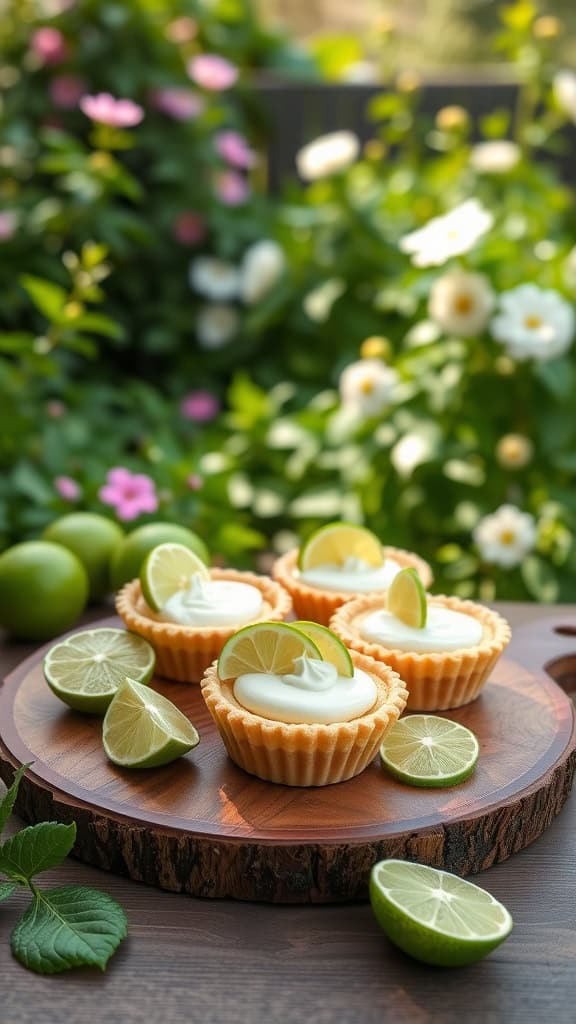
Mini Key Lime Pies are a delightful treat, perfect for those busy spring days when you want something refreshing and easy to prepare. These little pies pack a punch of tart lime flavor balanced by a sweet, creamy filling, all nestled in a crunchy graham cracker crust. They’re simple to make and require no baking, making them an ideal dessert option for any occasion.
With their bright flavors and colorful presentation, these treats are sure to impress your guests. Plus, you can make them ahead of time and store them in the fridge until you’re ready to serve. Let’s dive into the recipe and whip up some of these tasty mini pies!
Ingredients
- 1 1/2 cups graham cracker crumbs
- 1/4 cup granulated sugar
- 1/2 cup unsalted butter, melted
- 1 can (14 oz) sweetened condensed milk
- 1/2 cup fresh key lime juice
- 1 tablespoon lime zest
- 1/2 cup heavy whipping cream
- 2 tablespoons powdered sugar
- Extra lime slices for garnish
Instructions
- Make the Crust: In a bowl, combine graham cracker crumbs, sugar, and melted butter. Mix until well combined. Press this mixture firmly into the bottom and sides of mini tart pans or silicone molds.
- Prepare the Filling: In a separate bowl, whisk together the sweetened condensed milk, key lime juice, and lime zest until smooth. Pour this mixture into the prepared crusts.
- Chill: Place the filled crusts in the refrigerator for at least 2 hours to set.
- Whip the Cream: In a mixing bowl, beat the heavy whipping cream and powdered sugar until soft peaks form. Spoon or pipe this whipped cream over the chilled pies.
- Serve: Garnish each mini pie with a slice of lime and enjoy!
Banana Pudding with Vanilla Wafer Crust
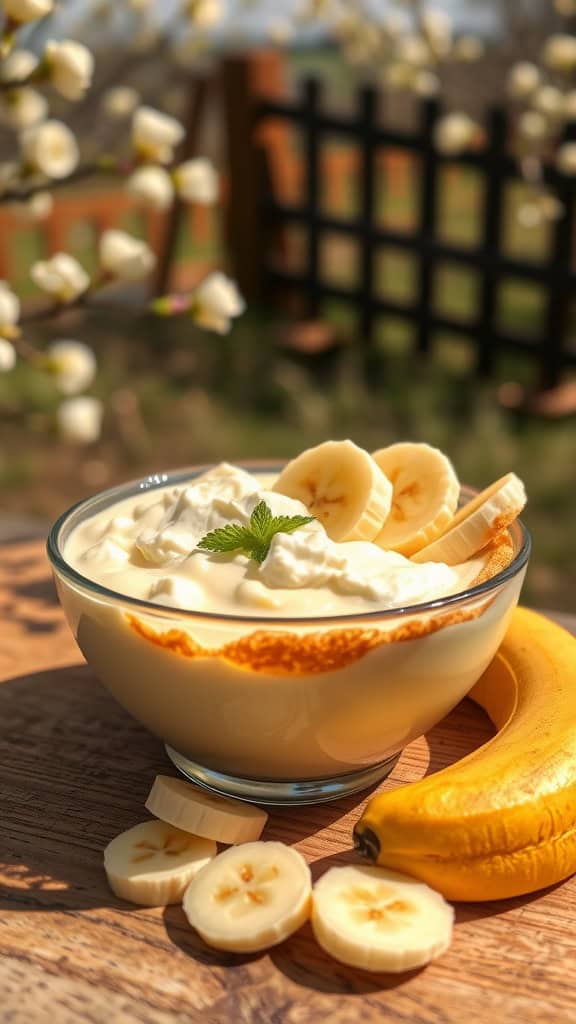
Banana pudding with a vanilla wafer crust is a delightful no-bake dessert that’s perfect for warm spring days. This treat is creamy, sweet, and has a satisfying crunch from the wafer crust. It’s simple to whip up and can be prepared ahead of time, making it a stress-free option for gatherings or a casual family dessert.
The combination of ripe bananas and rich vanilla pudding creates a harmonious flavor profile that everyone loves. You’ll enjoy layering the bananas with the pudding and crushed vanilla wafers for both taste and texture. It’s a fun and easy recipe to make with kids or friends, making it an ideal choice for busy days.
Ingredients
- 2 cups whole milk
- 1 (3.4 oz) box vanilla instant pudding mix
- 1 (14 oz) can sweetened condensed milk
- 1 cup heavy whipping cream
- 3-4 ripe bananas, sliced
- 1 (11 oz) box vanilla wafers
Instructions
- In a mixing bowl, combine whole milk and vanilla pudding mix. Whisk for about 2 minutes until thickened.
- Fold in the sweetened condensed milk until well blended.
- In a separate bowl, whip the heavy cream until stiff peaks form. Gently fold this into the pudding mixture.
- In a serving dish, layer the crushed vanilla wafers, sliced bananas, and pudding mixture. Repeat layers until ingredients are used up, finishing with whipped cream on top.
- Chill in the refrigerator for at least 2 hours to set before serving.
Chocolate Mousse with Whipped Cream

Chocolate mousse is a delightful treat that combines rich chocolate flavor with a light, airy texture. This dessert is perfect for busy spring days, as it requires no baking and can be prepared in just a few simple steps. The mousse is indulgent without being overly heavy, making it a satisfying end to any meal.
Making chocolate mousse is surprisingly easy and fun! Just whip together some chocolate, cream, and a few other ingredients, and you’ll have a luscious dessert ready to chill in the fridge. Topped with whipped cream, it’s a delightful combination that will impress family and friends alike.
Ingredients
- 8 ounces semi-sweet chocolate, chopped
- 2 tablespoons unsalted butter
- 3 large eggs, separated
- 1/4 cup granulated sugar
- 1 teaspoon vanilla extract
- 1 cup heavy cream
- Pint of whipped cream for topping
Instructions
- Prepare the Chocolate: In a heatproof bowl, melt the chocolate and butter together over a pot of simmering water, stirring until smooth. Remove from heat and allow to cool slightly.
- Whip the Egg Yolks: In a separate bowl, whisk the egg yolks and sugar together until thick and pale. Stir in the melted chocolate and vanilla extract until well combined.
- Beat the Egg Whites: In another clean bowl, beat the egg whites until stiff peaks form. Gently fold the beaten egg whites into the chocolate mixture until no white streaks remain.
- Whip the Cream: In a separate bowl, whip the heavy cream until soft peaks form. Gently fold the whipped cream into the chocolate mixture until fully incorporated.
- Chill and Serve: Spoon the mousse into serving dishes. Refrigerate for at least 1 hour to set. Before serving, top with whipped cream and enjoy!
Coconut Cream Pie Parfaits
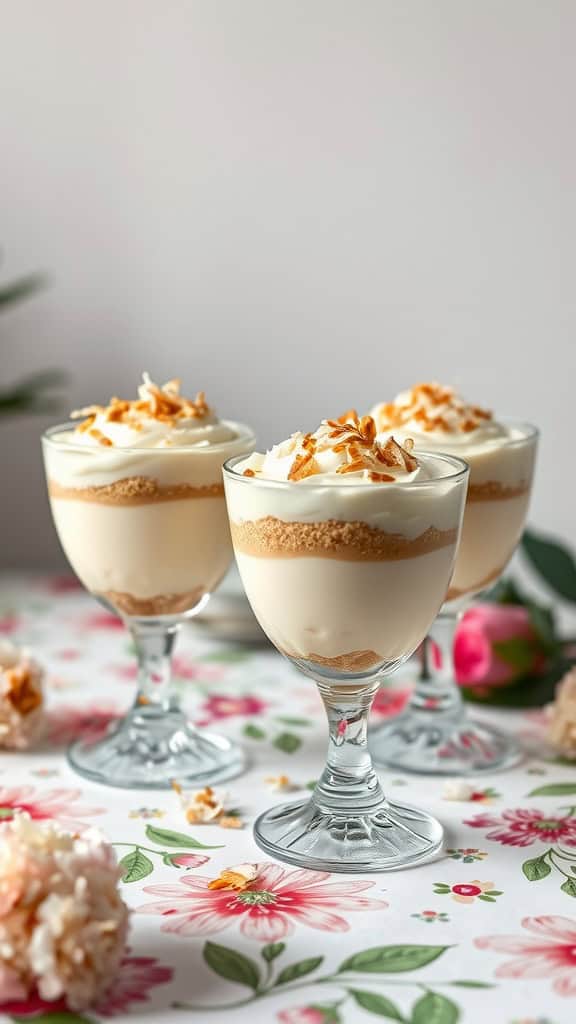
These Coconut Cream Pie Parfaits are a delightful treat, perfect for those busy spring days when you crave something sweet but don’t want to spend hours in the kitchen. With creamy coconut filling layered between crunchy graham cracker crumbs and fluffy whipped cream, each spoonful is a burst of tropical flavor. They’re incredibly simple to assemble, making them ideal for both casual family gatherings and more festive occasions.
The rich coconut cream blends beautifully with the lightness of the whipped cream, while the graham cracker crumbs add a satisfying crunch. These parfaits are not just easy to make, but they also look beautiful served in individual cups, making them a charming addition to any dessert table.
Ingredients
- 1 cup heavy cream
- 1/2 cup powdered sugar
- 1 cup cream of coconut
- 1 cup coconut milk
- 1 tablespoon vanilla extract
- 1/4 cup shredded coconut, toasted
- 1 cup graham cracker crumbs
- 1/2 teaspoon salt
Instructions
- Whip the Cream: In a mixing bowl, beat the heavy cream and powdered sugar until soft peaks form. Set aside.
- Mix the Coconut Filling: In another bowl, combine the cream of coconut, coconut milk, vanilla extract, and salt. Stir until well incorporated.
- Assemble the Parfaits: In serving glasses, layer the graham cracker crumbs at the bottom, followed by a layer of the coconut filling, then add a layer of whipped cream. Repeat the layers until the glasses are full.
- Garnish: Top each parfait with additional whipped cream and sprinkle toasted shredded coconut for a finishing touch.
- Chill and Serve: Refrigerate for at least 30 minutes to allow the flavors to meld, then serve and enjoy!
No-Bake Lemon Tart with Fresh Berries
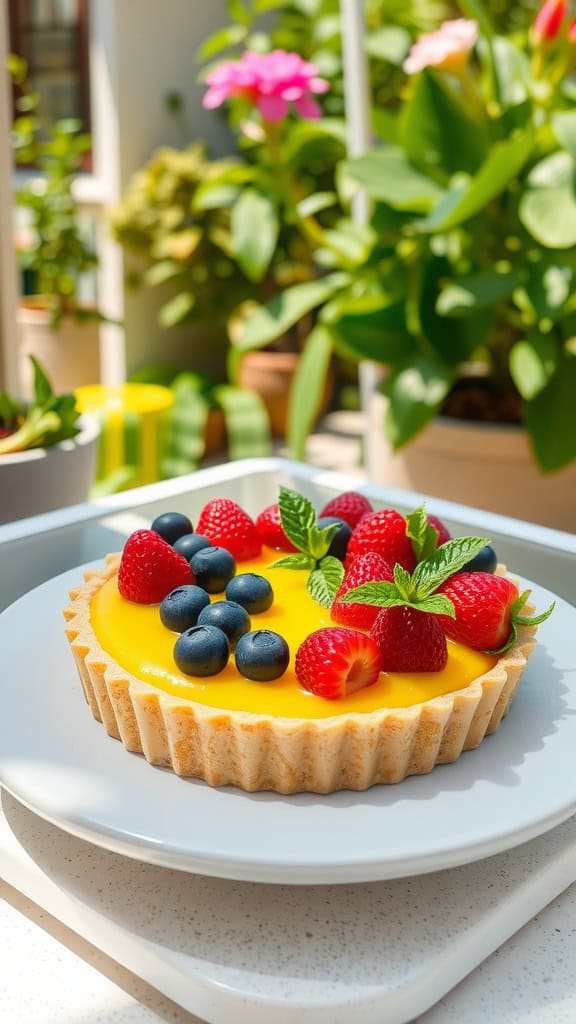
If you’re looking for a refreshing dessert that’s also simple to prepare, this No-Bake Lemon Tart with Fresh Berries is a delightful choice. It combines the zesty brightness of lemon with the sweetness of fresh fruits, creating a balance that’s perfect for those busy spring days.
This tart is creamy, tangy, and beautifully garnished with vibrant berries, making it not only tasty but also a feast for the eyes. Plus, it requires no baking, which means you can whip it up quickly and spend more time enjoying your day!
Ingredients
- 1 1/2 cups graham cracker crumbs
- 1/3 cup granulated sugar
- 1/2 cup unsalted butter, melted
- 1 cup heavy cream
- 8 oz cream cheese, softened
- 1 cup powdered sugar
- 1/2 cup fresh lemon juice
- 1 tablespoon lemon zest
- Fresh berries (strawberries, blueberries, raspberries) for topping
Instructions
- Make the Crust: In a mixing bowl, combine graham cracker crumbs, sugar, and melted butter. Press the mixture into the bottom and up the sides of a tart pan to form a crust.
- Prepare the Filling: In another bowl, beat the cream cheese until smooth. Gradually add the powdered sugar, lemon juice, and lemon zest until well combined.
- Whip the Cream: In a separate bowl, whip the heavy cream until stiff peaks form. Gently fold the whipped cream into the lemon mixture until smooth.
- Assemble the Tart: Pour the lemon filling into the prepared crust, smoothing the top with a spatula. Refrigerate for at least 4 hours or until set.
- Garnish: Before serving, top with fresh berries for a burst of color and flavor.
Peanut Butter and Chocolate Dessert Cups

Peanut Butter and Chocolate Dessert Cups are a delightful treat that combines rich chocolate and creamy peanut butter in a simple and satisfying way. These cups are perfect for busy spring days when you crave something sweet but don’t have much time to spare. With just a few ingredients and no baking required, they come together quickly and taste like a dream.
The creamy texture of the peanut butter pairs beautifully with the smooth chocolate, making each bite a delicious blend of flavors. Whether you’re serving them at a gathering or enjoying them as an after-dinner treat, these dessert cups are sure to please everyone!
Ingredients
- 1 cup chocolate chips
- 1/2 cup creamy peanut butter
- 1/4 cup honey or maple syrup
- 1/2 teaspoon vanilla extract
- 1/4 cup crushed graham crackers (optional)
- Pinch of salt
Instructions
- Prepare the Chocolate Layer: Melt the chocolate chips in a microwave-safe bowl, heating in 30-second increments until smooth. Stir in a pinch of salt.
- Assemble the Cups: Line a muffin tin with cupcake liners. Spoon a layer of melted chocolate into the bottom of each liner, about 1/3 full. Place the tin in the refrigerator to set for about 10 minutes.
- Make the Peanut Butter Filling: In a separate bowl, mix together the peanut butter, honey (or maple syrup), and vanilla extract until well combined. If desired, fold in the crushed graham crackers for added texture.
- Fill the Cups: Remove the muffin tin from the fridge and spoon the peanut butter mixture on top of the chocolate layer, filling each cup about 2/3 of the way full.
- Top with More Chocolate: Pour the remaining melted chocolate on top of the peanut butter layer, covering it completely.
- Chill: Return the muffin tin to the refrigerator and let it chill for at least 30 minutes to fully set the layers.
- Serve and Enjoy: Once set, carefully remove the dessert cups from the liners and enjoy your delicious Peanut Butter and Chocolate Dessert Cups!
Layered Berry Cheesecake Jars
Layered berry cheesecake jars are a delightful treat that’s perfect for hot spring days. They combine creamy cheesecake filling with fresh berries and a crunchy graham cracker base, creating a refreshing and satisfying dessert.
This recipe is incredibly simple to make and requires no baking, making it perfect for busy days. Each layer bursts with flavor, and the vibrant colors of the berries add a beautiful touch to your table. Get ready to impress your family and friends with this easy and tasty dessert!
Ingredients
- 1 cup graham cracker crumbs
- 4 tablespoons unsalted butter, melted
- 8 oz cream cheese, softened
- 1/2 cup powdered sugar
- 1 teaspoon vanilla extract
- 1 cup whipped cream
- 1 cup strawberries, sliced
- 1 cup blueberries
Instructions
- Prepare the Crust: In a bowl, combine the graham cracker crumbs and melted butter. Mix until well combined.
- Layer the Crust: Spoon a layer of the crumb mixture into the bottom of each jar, pressing down lightly.
- Make the Cheesecake Filling: In another bowl, beat the cream cheese until smooth. Gradually add powdered sugar and vanilla extract, mixing until well combined. Then gently fold in the whipped cream until smooth.
- Layer the Filling: Spoon a layer of the cheesecake filling over the graham cracker crust.
- Add the Berries: Layer sliced strawberries and blueberries on top of the cheesecake filling.
- Repeat Layers: Add another layer of crust, cheesecake filling, and berries until jars are filled.
- Chill and Serve: Cover the jars and refrigerate for at least 1 hour before serving. Enjoy your delicious layered berry cheesecake jars!
Strawberry Shortcake Trifles
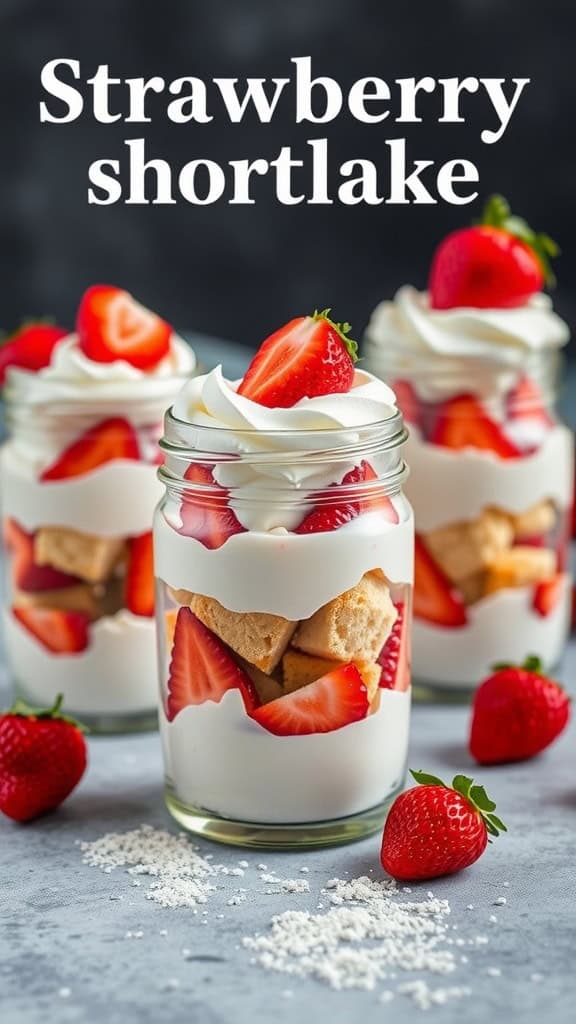
Strawberry shortcake trifles are a delightful and simple dessert that’s perfect for busy spring days. With layers of fluffy whipped cream, fresh strawberries, and tender cake, each bite bursts with flavor and freshness. This no-bake treat is quick to assemble, making it a hassle-free option for gatherings or a sweet ending to a weekday meal.
The combination of creamy and fruity textures creates a refreshing experience, while the visual appeal of the layered ingredients makes it an eye-catching centerpiece. Whether you’re serving it at a picnic or enjoying it at home, these trifles are sure to please!
Ingredients
- 2 cups fresh strawberries, hulled and sliced
- 1 cup whipped cream
- 1 cup pound cake, cut into cubes
- 2 tablespoons powdered sugar
- 1 teaspoon vanilla extract
Instructions
- Prepare the Strawberries: In a bowl, mix the sliced strawberries with 1 tablespoon of powdered sugar and let them sit for about 10 minutes to release their juices.
- Make the Whipped Cream: In another bowl, combine the whipped cream, remaining powdered sugar, and vanilla extract. Gently fold until smooth.
- Layer the Trifle: In serving glasses or jars, start with a layer of cake cubes, followed by a layer of sliced strawberries, then a layer of the whipped cream mixture. Repeat the layers until the glasses are filled, finishing with whipped cream on top.
- Chill and Serve: Refrigerate the trifles for at least 30 minutes before serving to allow the flavors to meld. Enjoy your fresh and easy dessert!
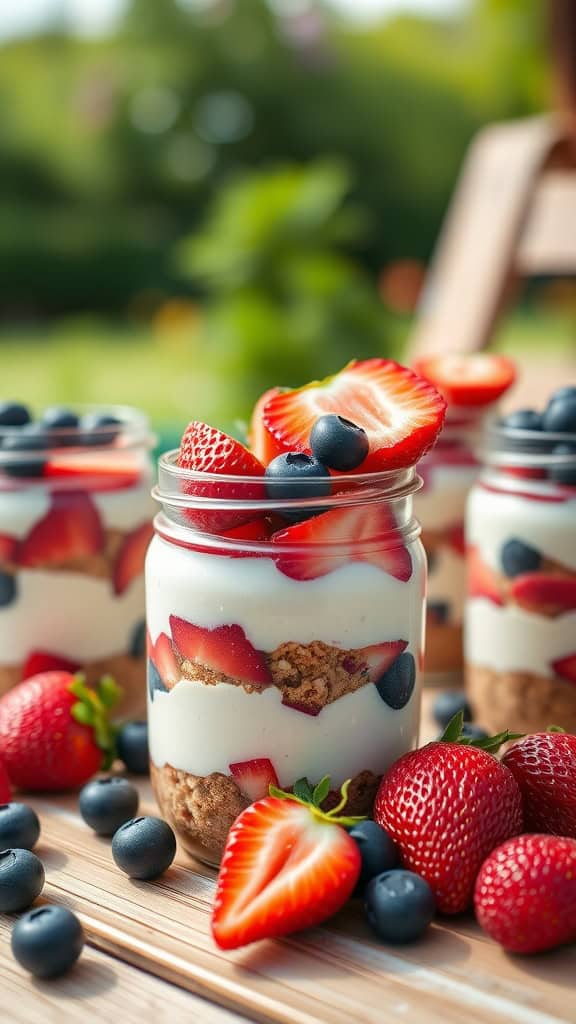
Fruit and Yogurt Parfaits

Fruit and yogurt parfaits are a delightful and refreshing treat, perfect for busy spring days. Layered with creamy yogurt, fresh fruit, and crunchy granola, they offer a balance of flavors and textures that’s both satisfying and nutritious. This dessert is simple to make, requiring no baking, making it an ideal option for quick snacks or light meals.
Not only are these parfaits visually appealing, but they are also customizable to your taste. Use seasonal fruits like strawberries, blueberries, and peaches for a burst of fresh flavor. Plus, you can choose your favorite yogurt, whether it’s Greek, plant-based, or classic. This recipe is not just easy; it’s also a fun way to get the kids involved in the kitchen!
Ingredients
- 2 cups yogurt (Greek or regular)
- 2 cups mixed fresh fruit (such as strawberries, blueberries, and mango)
- 1 cup granola
- 1 tablespoon honey or maple syrup (optional)
- Fresh mint leaves for garnish (optional)
Instructions
- Prepare the Ingredients: Wash and slice the fresh fruit into bite-sized pieces.
- Layer the Parfaits: In a glass or bowl, start with a layer of yogurt at the bottom, followed by a layer of granola, then a layer of mixed fruit. Repeat the layers until the glass is full.
- Add Sweetness: If desired, drizzle honey or maple syrup between the layers for added sweetness.
- Garnish: Top with a few pieces of fruit and fresh mint leaves for decoration.
- Serve Immediately: Enjoy your parfaits right away, or refrigerate for a short time before serving.

Lila Ashford is the creator of Tofu Moo Recipes, where she shares her love for indulgent desserts, refreshing drinks, and irresistible snacks. With a passion for simple pleasures and a flair for cozy elegance, Lila hopes to inspire moments of joy in every bite. Follow her for more delightful creations!